December 20, 2010

Moghrabieh (or Mograbeyeh)


Can I talk to you about moghrabieh? Also spelled mograbeyeh. And mograbieh. A.k.a. Lebanese couscous and Syrian couscous.


It was a learning experience.

For those of you familiar with Israeli couscous (which I am not) perhaps moghrabieh won't seem so foreign. But for those, like me, who only ever use the pin-head sized couscous, moghrabieh is a whole 'nother country.

What is it? Well, as the photo above shows, it's slightly irregular balls of buckshot-sized pasta.

What the photo doesn't show, however, is the fantastically chewy nature of these little beasts. Moghrabieh is incredibly starchy, so much so that, if you want to cook it pilaf style as I tried to, I would recommend parboiling it first to get rid of some of the starch.

Not that it wasn't a hit at my house. It was. But it had the just-ever-so-slight "fish eyes in glue" tapioca pearl-bubble tea texture. This is a beloved texture chez moi, so we were good with it, but for those who aren't, I'm just sayin'—parboil.

Nosing around on the web, I came up with a recipe that used it in soup, which seemed like a shockingly simple and good idea. All the starch these little balls give off would serve to thicken a soup and give it body. So I dumped my leftover moghrabieh into this soup recipe, except that I accidentally added curry powder instead of cumin and then thought "what the heck" and threw in a few handfuls of dal and added some leftover homemade cilantro-garlic paste from my fridge. (I love to use up leftovers.) But I'm sure the recipe is great as is, so go ahead and make it. The Vegetarian loved this soup, and I added some diced spanish chorizo to my bowl to satisfy my carnivorous lust.


Another moghrabieh recipe that intrigued me was this one. Also, I think if you steam it for, like,  two hours, you can use it like regular couscous.

And I'm thinking of using it instead of nokedli the next time I make chicken paprikas. Mainly because my cousin borrowed my nokedli maker and hasn't returned it yet. (I have lots of cousins, but if you're reading this, nokedli-maker-borrowing cousin, you know who you are.) Nokedli, for those of you who are not Hungarian, are the spaetzle-like dumplings that get served with chicken paprikas and, if you're my kids, are the only reason for having chicken paprikas, really.

So there you have it. Moghrabieh.

Try it. You'll like it.

December 11, 2010

Pozole


Well folks, it's another one of those "I love my pressure cooker" posts. Today it's all about pozole, which the Soccer Monster enjoyed so much, he ate it for breakfast, lunch, and dinner for two days.

Before those of you who don't have pressure cookers roll your eyes and turn away from this post, let me assure you that making pozole is just as easy without a pressure cooker. It merely takes much, much longer. And that time issue is frequently what keeps me from making something. If I'm trolling the aisles of the grocery store at 3 pm and think of making pozole and realize that it takes at least 2 hours, I'll probably pass. But if I think it could take an hour or less, I'll go for it. So that's why I love my pressure cooker.

But enough about my beloved companion. Let's talk pozole.  This recipe is so easy and so absolutely scrumptious, once you've made it, you'll wonder how you've gone all these years without it.

Also, as is true of many of my favorite recipes, it's a one pot meal. Easy, with less clean up. Love the one-potters!

I used canned white hominy in this recipe, and while traditionalists might disdain it, it seems to work just fine. I'm sure if I took the trouble to cook my own (and I will one day) I would have a revelation and vow never to go back to the canned stuff again, but right now the canned stuff suits me just fine. It's kind of like beans—sure, dried ones are better, but using canned is better than not eating beans at all.

The really important thing about this recipe is the pork. Chunks of boneless pork shoulder or boneless country-style ribs work best here—other cuts will be tough. However, be sure to trim as much fat as you possibly can off the pork before cooking it. Otherwise, the broth will be too fatty and you will have to defat it, an extra step that—egads!— uses up more pots and pans.

Traditionally, pozole is served with lots of garnishes—diced radishes, diced onions, more oregano, avocados, sliced cabbage or lettuce, lime, sliced jalapenos, and cilantro—which can add considerably to your prep time. If you want to streamline, you can skip most of the garnishes. I skipped the cabbage, onions, oregano, and avocados this time, and you can skip the radishes and jalapenos. But the cilantro and lime do add important finishing touches.

Really, make this for dinner tomorrow night. Your family will sigh with pleasure and thank you.

Mine certainly did.

Pozole


1 onion, diced
1/2 green pepper, diced
1 jalapeno, seeded and diced
2 cloves of garlic, minced
2 tablespoons olive oil, regular oil, or lard
1 and 1/2 pounds boneless pork shoulder or country-style ribs, trimmed of all fat and cut into smallish chunks
1 tablespoon cumin
1/2 teaspoon oregano
1 tablespoon salt
1/2 teaspoon pepper
2 large cans white hominy, drained and rinsed
1/4 cup minced cilantro
1 can chicken broth 
lime wedges and more minced cilantro, for garnish


In a pressure cooker or soup pot, heat oil or lard and saute onion, green pepper, and jalepeno until softened. Add garlic, pork, spices, salt, and pepper. Add water just to cover. Bring to a boil, cover pan, and simmer until pork is almost tender—about a 1/2 hour in the pressure cooker or an hour in a regular pot.


Take off lid, add hominy, cilantro, chicken broth and re-cover. Simmer for another 20 minutes to 1/2 hour in pressure cooker or another 45 minutes to an hour in a regular pot. Make sure pork is tender and check for seasoning. Ladle into bowls and serve with lime wedges, cilantro, warm corn tortillas or tortilla chips and, if desired, sliced jalapenos, shredded cabbage or lettuce, diced radish, sliced avocados, diced onion, and more oregano.


*This dish is great reheated the next day, but the hominy will continue to absorb the soup broth as it sits, so you may need to add more broth or water before reheating.


**You can make this with chicken instead of pork. But you will have to make and strain broth ahead of time and take meat off bones and shred. You could probably make it with boneless chicken and canned broth, but it would not be as good. I think the mix of pork and chicken broth works best.

November 6, 2010

Soupe Au Pistou


A hailstorm recently decimated most of what remained in our garden, including the last of our basil. Of course I didn't realize that until after I had come home from the farmer's market, laden with zucchini and potatoes and cavalo nero and carrots, promising to make the Vegetarian a nice soupe au pistou. (She loves pesto. She loves soup. Two great tastes and all that.)

The regular basil had been reduced to a few sorry, straggly strands, but there was still a little bit of thai basil  left. So I squelched traitorous thoughts of delicious thai drunken noodles redolent with spicy thai basil and picked all the basil that was left, thai or otherwise. I mean, I knew that motherhood meant sacrifice, but I didn't realize how much that sacrifice would extend into my kitchen. The last bowl of soup? It's yours. No onions in that sauce? Well, okay. No mushrooms ever, in anything? Hmm, I'll have to think on that. Take my firstborn instead. Oh wait, you are my firstborn. Never mind.

I figured that, topped off with parsley and mixed with loads of garlic and parmesan and swirled into soup, the anisey flavor of the thai basil wouldn't be so noticeable.

And you know what?

I was right.

This soupe au pistou is not particularly traditional, made up on the fly as it is and all. But it is in keeping with the spirit of these kinds of soups, which are all about turning the season's bounty into a bowl of steamy, delicious goodness.

I would also post about the super-delicious thing I did with the rest of that zucchini, but of course I forgot to take a picture of it. Fortunately, zucchini is still around, so maybe next time.


Soupe au Pisou
(makes about two quarts)


for the soup:
1 onion or leek, finely chopped
2 carrots, peeled or scrubbed and cut into 1/2 inch dice
1 stick celery, cut into 1/4 inch dice
2 potaotes, peeled and cut into 1/2 inch dice
1/2 pound green beans, trimmed and cut into inch-long pieces
(I used 1/2 green, half yellow wax beans)
1/2 bunch cavalo nero (tuscan kale) or regular kale or any other green you like, cut into thin ribbons
1 medium zucchini, cut into 1/2 inch dice
1 cup cooked beans (I used canned chickpeas, but you could use anything, really, except perhaps black beans)
1 sprig thyme
olive oil ( or butter or bacon fat—your choice)
water or broth


for the pesto:
1/4 cup packed basil leaves
1/4 cup packed flat leaf parlsey
2 cloves garlic
1/2 cup grated parmesan
olive oil


In a stockpot or large heavy saucepan, saute onion and celery with a quarter teaspoon salt (and a half teaspoon crushed red pepper, if you like) in oil until soft. Add remaining vegetables, beans, thyme, a 1/2 teaspoon salt, and cover with water or broth. (should be about 6 cups of liquid). Bring to a boil, then reduce heat to simmer and cook, covered, until vegetables are tender. Salt and pepper to taste.


While soup is cooking, make pistou. In a blender or food processor, process basil, parsley, garlic, and cheese until the mixture is fairly smooth. With motor running, add olive oil a little at a time until a thin pesto-like consistency is reached.


Serve soup with a tablespoon of pistou swirled into each bowl. Pass extra grated parmesan, if you desire.

October 14, 2010

Freekah Salad


Can I talk to you about freekah? Yes, it is freaky. Freakily good, that is.

Freekah (also spelled freekeh and frikeh) is wheat that's been picked while green and then smoked. Cooked, it tastes like a smokier, nuttier wheat berry. If, like me, you happen to love chewy grains, then I urge you to try it. While it may not be on the shelf at your local supermarket, it shouldn't be terribly hard to find. Middle Eastern stores should carry it. I get mine either at Sahadi's on Atlantic Avenue in Brooklyn or at the local greenmarket. The greenmarket freekah is superior to the boxed kind, and, not surprisingly, twice the price. Compared to other grains, freekah is expensive. But it's worth it.

If you google for freekah recipes, you will come up with a lot of stew-like dishes made with lamb. However, I love chewy whole grains served as room temperature salads, so I decided to make one up. While I cooked the freekah in my pressure cooker (HIMHMILMPC?) I roasted some cauliflower and cut up a leftover artichoke heart I had in my fridge. Then I mixed the warm, cooked freekah with the veggies, some crushed raw garlic, olive oil, lemon juice, and chopped fresh herbs. The herbs are key. They take the salad right over the edge into amazing deliciousness.

This salad is best at room temp but can be made a few days ahead and kept in the fridge until you want to serve it. Of course, the Vegetarian loves it and will take it for lunch all week.

I like the combo of the cauliflower and the smoky freekah, but you could use any vegetable you wanted, really. Also, feel free to add in some feta cheese or some olives or anything else you're inspired to. I'm giving the recipe below without the artichoke heart, because I don't think it's worth cooking an artichoke just for this (and I don't think the canned/jarred ones are good for this—too vinegary). But if you happen to have an extra steamed artichoke lying around the fridge (something that's only happened to me about once in my life, and you're looking at the results) by all means, add it.

So the salad recipe is just a guideline. Mainly, I wanted to spread the gospel about freekah. Try it once, and I promise that, like me, you'll be hookah.


Freekah Salad with Roasted Cauliflower


2 cups freekah
1 head cauliflower (small, medium, or large—it doesn't matter)
1 clove garlic, pressed or minced
olive oil
juice from one lemon
1-2 cups mixed fresh herbs, some combination of parsley, cilantro, dill, and mint.
salt and pepper to taste.


Preheat the oven to 400.
The freekah is cooked like brown rice. Put the freekah, five cups of water, 1 tsp of salt, and 1tbsp of olive oil in a large, heavy saucepan. Bring to a boil, stirring occasionally. Cover tightly, lower heat, and simmer for 45 minutes, until water is absorbed and grains are chewy but still tender.
Meanwhile, cut the cauliflower into florets, toss with some olive oil, salt, and pepper, and spread in a single layer on a baking sheet. Roast, stirring occasionally, until the cauliflower is tender and caramelized.
In a bowl, mix cooked freekah with roasted cauliflower, garlic, and lemon juice. (start with the juice of half a lemon, taste, and add more if you like it more acidic.) Add in herbs and toss again. Let sit for at least 1/2 hour before serving, so flavors can mingle.

October 7, 2010

Carolina Seafood Feast


While my family was here this summer and I wasn't blogging, we went to the beach in North Carolina for two weeks. A beach vacation in North Carolina is a family tradition—we've been going since I was a kid. It made more sense then, when we lived in North Carolina, but even now, the beaches are so nice and the whole vibe so relaxing that it's worth making the trek down from Brooklyn.

For me, one of the main attractions of the NC beach is its warm water—no matter how long I live in the Northeast, I never get used to the cold ocean up here. People up here always say that it's refreshing, or that they don't like too warm "bath" water, but I think that's a bunch of rationalizing hogwash. Warm water is better—you can frolic in it all day long, and if these same people are so set on their "refreshing" water, why do they go to Miami, or the Caribbean, or Mexico? Do people spend time in St. Bart's thinking, "I wish the water were cooler?" I don't think so.

Anyway, all of this is just to say: imagine my surprise when we arrived at the NC beach this summer and the water was—cold! Not just cool, but a toe-numbing cold, a less-than-60 degrees F cold.

The culprit was something called a "coastal upwelling" in which winds push the warmer surface water away and deeper, colder water rises up to replace it. Upwelling, upschmelling, all I know is that it almost ruined my beach vacation. I had never spent two weeks at the beach before and was really looking forward to it, but somehow it wasn't the same when I was reluctant to go in the water.

Anyway, the point of all this is that, instead of swimming, a lot of cooking and baking got done (mainly by my mom, but some of it by me). And that's why you're reading this, right? To hear about the food.

The pic above shows my version of a Carolina seafood platter. I love the fresh shrimp that you get down there, and the crabs. And I like them best just boiled up with some Old Bay or other seafood seasoning. (Here we used some house brand that the fish store had.) Peel-and-eat fresh shrimp and some crabs, what could be better? Well, most of my family doesn't like shrimp. Or crab, apparently. Too much work, they all say.

So thank goodness for the fish. My brother was out surfcasting every dawn and dusk, and one pleasant side effect of the cold water was that he caught a lot of fish. And I mean a lot. He had two hooks on each of his poles (In case you haven't figured it out, my brother is one of those fishing-crazy guys. Weird, I know, but it takes all kinds.) and sometimes the Soccer Monster and his cousins would be fishing with him and they would cast their lines and pull in a fish on each hook less than a minute later. My brother threw three quarters of the fish he caught back and we still ate fish almost every morning, noon, and night. My mother usually fried them, which is how you see them on this platter, but towards the end we started to grill them, and I prefer them grilled, I think.

To go with the seafood platter, my mother made this, a classic Hungarian dish and a childhood favorite of mine.


Then, the next day, I made these with the leftovers and everyone raved about them.


Of course they raved, because these were incredibly time-consuming (though not difficult) to make, what with picking the leftover crab out of the shell and all. It's not my favorite ratio, the "time spent preparing food:wow factor" one. I have some quick dishes that really wow, but the world needs more of these, especially for us lazy busy cooks.

I'll leave you with a recipe for the cabbage noodles, because, trust me, you don't want to make the time-consuming seafood cakes and the platter is so simple, it doesn't need a recipe. And besides, these noodles are delicious.


Hungarian Noodles with Cabbage


1 medium head green cabbage
1 pound wide egg noodles
1 stick butter
4 tsp sugar
salt and freshly ground black pepper.


1) Shred cabbage, place in a colander, and sprinkle liberally with salt.  Leave for at least 15 minutes. Then rinse, shaking colander to get rid of excess water.
2) In a heavy saute pan, melt the stick of butter. when foam subsides, add sugar and stir till it begins to caramelize, turning a light brown. Add cabbage and stir for one minute, or until cabbage begins to wilt a little. Then lower heat and cook cabbage, stirring frequently, until it is soft and brown, about 15-20 minutes.
3) Meanwhile, bring a pot of water to a boil and cook noodles according to package directions. (Or, if you're me, cook them a minute less than the package says.)
4) When cabbage is done, add cooked, drained noodles to it and mix. Grind on lots of black pepper and salt if needed. Mixture will be dry, but if it seems too dry, add in another tablespoon of butter and some pasta cooking water.


Makes a great buffet dish, as it's good at room temperature as well.

October 1, 2010

Rainy Day Meatballs


Okay, so I haven't posted for almost two months. I didn't think I was going to take the summer off, but it just kind of happened. My family was here from Thailand. We went on a bike trip. The Soccer Monster started middle school in Manhattan (and joined his third—count 'em, three—soccer team), which meant adjusting to 6:30 am mornings. (Those of you who know me well will know how hard this was for me.)

But now I'm back. And playing around with my photos. This is the polaroid look. Do you like it?

And cooking. Trying to do lots of cooking, though as the kids get older and their days get busier, it gets harder. But I'm tryin'.

It's rainy and gray here today—has been all week. One of my favorite things to make on a drizzly, wet, stay-at-home-all-day day is meatballs in tomato sauce. This dish is a real example of how my neighborhood has changed me. Before I moved to this Italian-American neighborhood, it would never have occurred to me to make meatballs. It wasn't something I ate when I lived in Italy. I didn't even like them that much.

But then one day I tasted my friend Emma's meatballs. She's an old-school Italian-American gal and a mean cook. Her meatballs hooked me. And besides, the soccer monster likes them and will eat a lot of them. And whatever that scrawny bag of bones will eat a lot of gets made often in this house.

When I first set out to make meatballs, I went for the complex everything-but-the-kitchen-sink approach. Tons of stuff went into them. Parsley. Ricotta Cheese. Fresh Garlic. Diced pancetta or bacon. But I soon gave up that approach because
a) It was too complicated and usually required two trips to the store. (The second trip was to pick up what I forgot the first trip.)
and
b) The kids didn't like the fancy meatballs so much. (This was back when the Vegetarian wasn't a vegetarian yet.) They didn't like the parsley, or the bite of the fresh garlic, etc, etc.

And while I hate to cater to annoying kids with unsophisticated tastes, this is, of course, exactly what I do most nights. And besides, I am a lazy busy cook, and those complex meatballs were killing me. After mixing up all those ingredients, I fried the meatballs on the stove and then carefully placed them in a pot of made-from-scratch tomato sauce. I'm not saying those meatballs weren't good, but were they worth it, in the time vs. outcome sense? Not to me, anyway.

So behold, my rainy day meatballs. Simple ingredients, simple process. Though they do require several hours in a hot oven, there's very little hands-on time. It will take you longer to read this recipe than it will to make it.

Honestly, they couldn't be easier.

Rainy Day Meatballs


2 pounds ground meat (I like a beef, pork, veal combo best, but you can use anything you like. I've never tried it with turkey or chicken, but they should work, though they might be a little dry. This def works best with meat that has some fat in it, like ground chuck.)
2 slices bread (white or whole wheat, supermarket sliced or artisan—doesn't really matter)
1 cup milk
1 egg
1/2 cup parmesan cheese
1 tsp garlic powder
1 tsp onion powder (optional)
1 tsp fish sauce (optional)
1/2 tsp dried oregano (optional)
1/2 tsp dried basil (optional)
salt and pepper
olive oil 
crushed red pepper flakes (optional)
one 28-oz can crushed tomatoes or one box pomi strained or chopped tomatoes or similar amount of tomato sauce or other tomato product


Preheat oven to 400.
Crumble the bread into a bowl and pour milk over it. Let it sit until bread is completely soaked and can be crumbled into a paste with the milk.
Add the ground meat, egg, cheese, garlic powder, onion powder (if using), fish sauce (if using—I add fish sauce to a lot of tomato-based things; it adds some extra umami punch.), oregano, basil,  and salt and pepper. Season very liberally. Taste mixture and adjust seasonings as necessary. (If you're wimpy about tasting a raw ground meat mixture you can fry a mini meatball up in a pan, but I am too lazy busy to bother with such things. I've been tasting raw ground beef mixtures for years now and I'm still here, but hey, we all make our own choices.)
Liberally oil a shallow saute pan or a casserole pan with a lid. Make golf-ball sized meatballs with the meat mixture (or any size meatballs you want, really) and place in the oiled pan.
Place pan, uncovered, into hot oven and cook until meatballs are fairly brown, about 45 minutes.
Take pan out and carefully pour tomatoes over and around meatballs. Season tomatoes liberally with salt and/or crushed red pepper and/or some fish sauce. Carefully try to mix the seasonings in, but don't worry too much if you don't do a good job of it.
Cover the pan and put back into the oven. Reduce oven temperature to 375 and cook for about an hour. If you want, you can baste meatballs with sauce occasionally during this time, but it's not really necessary.
Take pan out of oven. Mix sauce around and then taste it and adjust seasonings. Uncover pan, put back in the oven, and cook for about a half hour longer, or until sauce is thickened and meatball tops are browned.


Garnish with fresh basil leaves and serve with seeded Italian bread. Or over pasta.

July 8, 2010

Thai Food #3 (Seafood)


Apologies for going so long without posting. My family arrived from Bangkok, Mr. Coffee's mom came in from the Midwest, the Soccer Monster graduated from 5th grade (gulp!) so June was one long emotional and logistical jam, where I barely had time to think, never mind post. But the Soccer Monster, who follows my blog religiously (Isn't that why we have kids—to have some fans?), has been bugging me about posting, claiming that if I go over a month I will lose all my readers and will never be able to make a fortune off my blog. That kid has dreams of glory and I hate to tell him that I only have about four readers, all of them related to me (It's better if he finds out on this blog, isn't it?), so, sufficiently chastised, I have sucked it up, wiped the sweat off my neck, and settled down at my furnace-like desk to post.

So I'm back. And, as promised, here's the last of my three posts about Thai food. This one focuses specifically on seafood, which we eat a lot of in Thailand because a) my SIL is crazy about seafood, and b) Thais in general seem to eat a lot of seafood and so there is a lot of it around.

The pic above is of garlic stir-fried langoustine-type shrimp. Utterly delicious. We got them at a restaurant near the beach where we took our fateful, near fatal, rafting trip. The food was so good, we ate there for lunch and then again for dinner. This is the place I was talking about in my last post (oh so long ago) when I said that two of the three great meals from last summer were in the same place.

The restaurant was set over a manmade pond and had lots of bins with live seafood sitting around, waiting to be cooked. Here are a few of them:
Shrimp/Langoustine/Crayfish Thingies

Crabs. My personal favorite. Curried crab is one of my top fave dishes of all time.

Small clams, mussels, snails. I don't like the snails too much, but I love the clams and mussels.

Here are some of those items, cooked:
The mussels are those crazy green-lipped new zealand ones, which is what they have in Thailand. The first time I saw those was almost 20 years ago on Koh Phi Phi (one of the most stunning islands in the world, though it's been ruined by overdevelopment) and I was blown away by the electric green color bordering their shells. They are beautiful to look at and quite delicious, but I think a tad less tasty than the Canadian mussels we get here in New York.

The clams are sauteed with chili and basil, which is not my favorite prep, but is still good. 

However, what I really want to point out are the two small bowls of dipping sauce in the lower right corner. This sauce is known as nam jim and is the most scrumptious thing in the entire world. Seriously, you could eat nails with this stuff. Which is crazy, since the sauce is incredibly easy to make and consists of about 5 ingredients: fish sauce, lime juice, chilis, garlic, and a pinch of sugar. Try making it and tossing some freshly cooked seafood in it. You'll think you died and went to heaven.

And here are some other seafood/fish dishes we had at this same restaurant. Just thinking about them now, almost a year later, is making my mouth water. Maybe all these Thai food posts were a bad idea.

Curried crab. Not the best version I've ever had, but not bad. To me, curried crab is like a hamburger. There are good one and there are less good ones, but there really are very few bad ones.

Whole fried fish. Or is it steamed? I can't tell from the pic and I honestly can't remember. But either way, a forkful of the fish flesh dipped in the nam jim is sensational.

Another crab dish. We order this kind of thing for my dad and my older nephew, who have what we call soft mouths, ie. they don't like/can't eat spicy food.

And here are many of the dishes all together, in their glory, half-eaten on the table. I wish I could transport myself back there right now.

That stainless-steel volcano-looking pedestaled thing is how they serve soup at most places in Thailand. Inside was a very delicious tom yum soup, a bowl of which is now my masthead.

So there you have it. Thai seafood is a) plentiful, b) delicious, c) in general, prepared fairly simply (curried crab and tom yum being exceptions), and d) always good if eaten with the world's most delicious dipping sauce.

Next up, Indian food! It's been too hot to cook around here, so I will be trotting out some old photos of Indian meals and discussing them. And, if I remember to bring my camera, perhaps some pics of the Indian meal my mom is making tomorrow night in cool, air-conditioned New Jersey.

June 8, 2010

Thai Food #2


In this post I thought I would talk about restaurants in Thailand, and a couple of dishes that I've had there but never found here in the U.S.

Every visit I've made to Thailand, there has been one restaurant meal that has been indescribably delicious. Actually, there are usually many, many meals that are indescribably delicious, but there's always one that stands out. A couple of times, it has been a meal at the Seafood Market on Sukhumvit Soi 24 in Bangkok, which is a big, cavernous restaurant where you first shop for your seafood and then give it to your servers and tell them how you want it prepared. Bangkok chowhounds dismiss Seafood Market as touristy and overpriced (which it is) but it does make the best version of curried crab I've ever had, which is what I go there for. I hear there are even better versions in Singapore and Malaysia, but I haven't had them.

Usually, though, the standout meal is in a place outside of Bangkok. We take a lot of road trips during our visits, which means a lot of eating out in roadside and small-town restaurants. These are usually the highlights of my eating experience. It never ceases to amaze me how a small roadside restaurant can whip out the seemingly endless supply of complex, super-spiced, highly flavored dishes that my SIL orders. Sometimes I'll peruse the menu and put in a request, but more often I leave myself in her capable hands.

During one visit, the standout was a meal on the water in the town of Sri Racha. (This is not the home of the wonderful red sauce in the green rooster bottle. The sauce originated in California—not sure why it's called sriracha sauce.)  This setting sounds nicer than it is, as Sri Racha is a sprawling industrial city and the restaurant was a rickety affair set out on stilts over some fetid, polluted water. But the meal was excellent. The standout dish was a plate of deviled red curry crab packed into the crab shells and broiled. I've never had anything like it since. In fact, I've never found this dish on another Thai menu inside or outside of Thailand.

Last summer there were actually two standout meals (well, really three, but two were in the same restaurant). The first was in the this restaurant:

This restaurant's setting looks much nicer in this picture than it actually was. The restaurant itself was situated behind a factory and the water was a murky strange color. I think this meal stood out for me because I had low expectations and then was blown away. I can't remember what exactly we had, and Mr. Coffee didn't take pics—damn him!—, but it was all fresh, spicy, and totally yummy.

Unfortunately, the picture at the top of this post was not from that restaurant. It was from this restaurant,
a strange, kitschy place with a sort of wild west meets aliens theme. Also on the water. (See a trend here?)

Though I didn't find this restaurant outstanding, we did order a couple of new dishes there, ones I've never seen on Thai menus here.
This was minced crispy duck, mixed with red curry, lime leaves, and some pickled green peppercorns. (Not sure that's what they were, but that's what they seemed like.) It sounds better than it actually was. I was really excited when it came to the table and happy when I had the first spoonful, and then things went downhill from there. So intense and perfumey, it was almost like a condiment.

These were delicious and I wish I remembered what they were called. They were some kind of red curry, lime leaf, and chili flavored pancake.
(See a theme here? My SIL makes fun of how much I like red curry. I'm almost alone in this, as most of my family, Mr. Coffee included, doesn't like red-curry or coconut-milk flavored things)
The pancake wedges get eaten with the cucumber sauce in the middle, which is the same cucumber sauce that comes with Thai fish cakes and shrimp cakes. These are sort of in the same vein as the cakes, but without the seafood, a boon for the Vegetarian, who shares my love of red curry. I would totally order these again if I could find them on a menu.

Next post: Thai seafood. And then I promise I'll stop, as it's probably annoying to read about a bunch of food you can't get here.

BTW—I'll be at the Brooklyn Blogfest tonight. I'm looking forward to meeting some other Brooklyn bloggers.

May 29, 2010

Thai Food #1


Lately Bangkok has been on my mind a lot. Last week I was very very worried about my family there, and sent them quite a few e-mails begging them to leave early for the summer and come here, which they sort of ignored but hey, then things calmed down and it looks like everything is okay at the moment.

It has been a little strange, in following the coverage in the New York Times, to see pictures of streets and areas you know pretty well looking like battle zones or on fire.

Oh, and that mall that burned down? That would be like the Macy's in Herald Square burning down. Hard to believe it's not there anymore.

With Bangkok, and by extension, Thailand, on my mind, I was going through some photos of our visit last summer and found a bunch of food pictures that Mr. Coffee—secret wannabe food blogger that he is—took. Looking at the pics made me think that I should post a little more about Thai food on this blog, because Thai food is perhaps the Thai people's greatest gift to the rest of the planet.

Thai cuisine, as far as I'm concerned, is one of the world's best. I start salivating the minute I know we are making one of our trips to Thailand, just thinking about all the yummy stuff I will soon eat.

I don't know if my experience in Thailand is typical. I suspect not. Not a lot of Thai food gets cooked in our house, my mother not being Thai and my SIL, while Thai, not being someone who cooks a lot. However, Bangkok, and Thailand in general, is the land of takeout and snacks, and there is never a moment in my family's Bangkok apt when some delicious Thai treat hasn't been brought in and left for everyone to enjoy.

My SIL is also crazy about fruit and every week goes to the market and brings back boatloads of it for the kids and everyone else to eat. We usually go to Thailand in the summer, and while not all my favorite fruits are in season in the summer, there are plenty of great ones to go around.

So I thought I would offer you guys a kind of Thai fruit primer, starting with the ones pictured above (and again below).


Let's go over them, shall we? Starting from left to right:

1) The big round one that looks like a melon was new to me last summer. Unfortunately, I never got an english name for it and can't remember the Thai name either. You cut it into wedges and eat it—it's a little bit like a cross between a melon and some sort of squash. Not bad, but I wouldn't go out of my way for it.
2) The little tan orbs mottled with black are longans. These are some of my favorites. You peel the thin skin and inside are usually two sections of a pale, translucent, juicy fruit, sweet but with a slight sour bite. Kind of like lychees, but less perfumey. I like them better. I don't care for lychees much, but these are a delight. I can eat a whole small bunch of them for breakfast.
3) The elongated apple-shaped red ones are rose apples. Super crisp and refreshing, but without a very strong taste. These are great for after exercising or sitting by the pool. In my mind the same function as watermelon, but with less flavor.
4) In the back are the small Thai bananas, which I love. First of all, the size is perfect—I don't need much more banana than that. Also, they are somehow creamier, richer, and more custardy-tasting than the bananas we get here.
(Those green things underneath the longans are apples—they don't merit discussing here.)


5) Mangosteens—These are the queen of fruits and I never get tired of eating them. I read somewhere once that Queen Victoria offered a knighthood to anyone who could successfully grow her a mangosteen in England, and I believe it.

I first encountered this fruit about 20 years ago, when Mr. Coffee and I were traveling around Sri Lanka, during their horrible civil war, as a break from traveling around India. (Explaining that would take up another post.) We were staying at a guesthouse in Kandy where we could use the kitchen, so we went to the market and marveled at all the things we could get there that we hadn't seen in India. Avocados, pineapple, real Pepsi—it was a deprived person's delight. We bought some mangosteens, which I had never even heard of, and took them back to the guesthouse, where our lives were changed forever.

Basically, you use your two thumbs to break into the hard outer shell of the mangosteen and inside are between 5 and 7 segments of snow-white, juicy flesh. You can tell how many segments you're going to get if you count the petals on the blossom end, a neat little trick my SIL taught me. (the one in the lower right that is blossom end up would have 6 segments inside.)

And the taste? I don't even know how to describe it, other than to say that it's close to heaven. If you're ever in a place where you have access to mangosteens, please don't pass them up. I have noticed that you can now get them in chinatown (in both Flushing and Manhattan) and if I didn't have access to them on a semi-regular basis, I would break down and buy some there, even though they are exorbitantly priced. But if you've never had one, I suggest you fork over the dough for them at least once, cause you just don't know what you're missing.

Have I made myself clear? Seriously, they're delicious.

6) Rambutans—These are the ones on the far right in the top picture, but unfortunately, I don't have a close-up pic of them. (What's up with that, Mr. Coffee?) I think a bowl of rambutans makes a great decorative item for your dining room, but I don't love eating them. They're okay, I guess. You break open that bright red, prickly looking shell and inside is translucent white flesh surrounding a seed. Much like lychees. Slightly perfumey. I prefer longans, which aren't as sexy on the outside but are much tastier inside.

And there you have it. There are plenty of other Thai fruits that I don't have pics of:
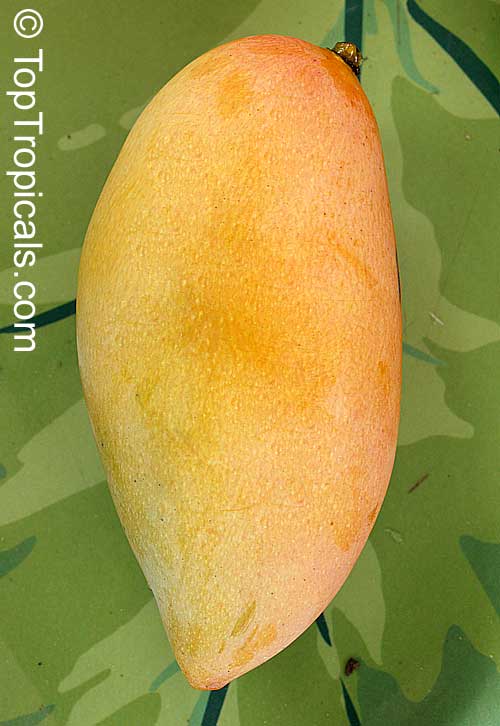
 mangoesdragonfruitThai papaya, which is pinker than the kind we get here, guavaspomelo, which is kind of like a grapefruit and the soccer monster's favorite, custard apples, which are one of my personal favorites, and, of course, durian, the king of Thai fruits, which, when ripe, is so stinky that it's often not allowed in hotels and other public places. (When my FIL came to Thailand once, he was staying at a hotel that had a sign prominently displayed saying "No Durians Allowed!" Being a human rights activist, this greatly upset my FIL, and when I came to pick him up at his hotel the first day, he hotly asked me, "Who are the durians and why are they being discriminated against?")

May 16, 2010

Pressure Cooker Kitchen-Sink Soup


I've learned a lot of things having a blog. One of them is that I need new plates. Vintage Mikasa black and yellow stoneware from the 70s just doesn't photograph that well. Nor does it make food look very appetizing.

Which is a shame, as this is a very appetizing soup. Also a thrifty one. The Vegetarian loves soup and I am always looking to make a hearty, nutritious one for her.

About once a week or so  I make what I call kitchen-sink soup, which is basically a lot of the leftover vegetables, beans, and rice in my fridge simmered together with a magic ingredient: a parmesan cheese rind. The rind is essential for a vegetarian soup—it adds that meaty, salty, umami quality that I used to to get by adding bacon or salami in the PV (pre-vegetarian) days.

In the old days I didn't make kitchen-sink soup as often as I wanted to because it involved a couple of hours of stovetop simmering and when it occurred to me to make the soup, I usually didn't have that much time before dinner.

But then enter my pressure cooker (HIMHMILMPC?). Now I can bung all the ingredients in there and voila!—soup in about 30 minutes.

The kitchen-sink soup pictured here contains some chinese-food leftovers (stir-fried spinach and white rice)  a can of cannelini beans, some leftover canned tomatoes, parsley, garlic, thyme—and the parmesan rind. All of it was languishing in my fridge, except the parmesan rind, which i keep a bag of in the freezer.

You can start the usual way by sauteeing some aromatics (onion, garlic, carrot, celery, etc) but this time I just threw everything into the pot with some broth and water. Sometimes I sneak chicken broth into the soup, but this time I think I used vegetable broth. I can't remember. I brought everything up to a boil and then cooked it on high pressure for about 20 minutes, letting the pressure come down naturally.

If I'm giving the Vegetarian the soup for dinner, I'll sometimes poach an egg in her serving, for added protein. Together with some whole grain toast, it makes for a fast and delicious vegetarian meal.

May 6, 2010

More Cake


Before anyone groans about two cake posts in a row, just know that it is birthday season around here. Both my kids have their birthdays in the spring, as do many of their (and our) closest friends. So springtime is always cake time.

This is one I made for the Vegetarian's friend, Arlo. I wrote on the cake and then the Vegetarian decorated it. Arlo asked for a chocolate cake with orange frosting. When pressed, he clarified that he wanted orange-flavored frosting, not orange colored frosting.

As with the German chocolate cake, I made this cake using ideas from a few different recipes.

The cake layers themselves were the recipe on the back of the Hershey's tin again, though I swapped the milk for sour cream and the water for hot coffee.

The middle was filled with a chocolate ganache, like this:


Then the top was iced with an easy version of Italian buttercream that I got from this chowhound thread, to which lots of orange zest had been added.


I enjoyed this cake. I liked the contrast between the ganache filling and the buttercream icing. A cake with ganche filling and frosting is often too richly chocolate, but if it's filled and frosted with buttercream i miss the moussy chocolate flavor of the ganache. So this cake lets you have both. The orange zest added just the right touch to the buttercream, which i sometimes think can be a little boring. I would make this cake again, tho I think that I might try a different cake layer recipe. This cake could use richer, denser, more poundcake-like cake layers, I think.

April 28, 2010

German Chocolate Cake


A couple of weeks ago I was charged with making a birthday cake for a friend whose favorite is German chocolate cake. (which, by the way, is not from Germany at all but is named after Mr. German, the founder of the Baker's chocolate company who came up with the recipe.)

I googled around looking for a recipe and came upon this one from David Lebovitz, whose blog is full of divine desserts. What was new about his recipe was the chocolate ganache that he used to frost the sides and I was immediately intrigued by that.

But I didn't want to make his cake layers, because they involved melting chocolate and separating eggs and beating the whites separately and when you're as lazy busy as I am, you just don't wanna do all of that.

So I hunted around some more and found this recipe at Apartment Therapy, which is basically the recipe from the back of the Hershey's cocoa tin. Perfect. Super easy. I did substitute sour cream for the milk and weak coffee for the water. Came out great—have no idea if it was any better than the original, though.

Then I turned my attention to the coconut-pecan filling. Though David's filling seemed fine, I remembered seeing an Epicurious recipe with a dulce-de-leche filling, which I found here. I was mainly interested in this filling because I had read somewhere that you could make dulce-de-leche in a pressure cooker by boiling a can of condensed milk for about 20 minutes. And you know me, any excuse to use my pressure cooker!

So in the end I used David Lebovitz's idea (and his frosting, although I had to add a lot of powdered sugar to it to make it spreadable. I was in a hurry, however, and I think if I had had time to refrigerate it, it would have spread just fine.), the Hershey's tin cake recipe, and the filling from Epicurious.

The verdict: People seemed to swoon over this cake, though I wasn't bowled over. It was much better a day or two later. I do like the darker chocolate cake rather than the lighter one you usually see for German chocolate cake. I also like the idea of the chocolate frosting—it adds another dimension. Would go for a less-sweet frosting next time—not David's fault but mine for adding all that powdered sugar.

In the end, I think my biggest disappointment was the dulce-de-leche filling. The dulce-de-leche itself came out great (20 minutes in the pressure cooker, people! Have I mentioned how much I love my pressure cooker?) but I didn't love that flavor profile for the filling. I think I like my filling straighter, with white sugar and a little brown sugar, so that it has more of a pecan-pie like quality.

But I would make this cake again. It was fairly easy and came out nicely impressive looking.


April 21, 2010

Lentil Salad


I didn't used to be a huge lentil fan. (Dal is another matter entirely.) Like many people, I thought they were boring and bland. But then, while I was living in Rome, I had a revelation one night at a restaurant.

It came in the form of lentils with cotechino, that quintessentially Italian winter dish of lentils and sausage. The unctuous cotechino sausage had deeply flavored the lentils with its fat, and the result was tiny orbs of rich, slightly creamy, deliciousness.

I was hooked. But, like many new converts, I had some caveats that continue to this day. I only like small lentils, like the Italian or the French "Le Puy" style lentils, except in soup.

Then, at Kalustyan's, an overpriced but fabulously stocked store in Manhattan's Little India, I discovered beluga lentils. Tiny and black, their name comes from their resemblance to caviar. Unlike other lentils that often turn slighly mushy when cooked, these stay firm and whole. Perfect for salads.

These days, I cheat and buy beluga lentils already cooked in a vacuum-sealed bag from Trader Joe's. They're one of my pantry staples, as it takes about five minutes to whip up a delicious salad with them. The one above has diced yellow pepper in it, and you could add all sorts of things like garlic and feta cheese and olives and capers and tomatoes, but honestly I prefer the salad very plain--as simple as possible. Do use the best olive oil you have, though, and don't be skimpy with it. You want them nicely glossed.

Lentils are another great thing to cook in the pressure cooker--like most legumes done in the pressure cooker, they come out cooked but firm, not mushy. (Have I mentioned how much I love my pressure cooker?)

Do make this salad. It's the kind of thing you bring to a pot luck or a party and everyone wants to know how you made it. I always fess up about how easy it is, but you are welcome to keep the secret to yourself.

Lentil Salad
2 cups cooked beluga or Le Puy lentils (If you don't have a pressure cooker and aren't buying the lentils already cooked, watch carefully to make sure they don't overcook and turn mushy. You want them to be cooked but firm and separate.)
About a half a bunch of chopped flat-leaf parlsey
Olive oil
Vinegar (I use an orange vinegar)
Salt and pepper
Toss lentils with enough olive oil to make them look glossy. Toss in chopped parsley. Add vinegar, salt, and pepper to taste. Let sit for at least an hour, or overnight in fridge. Serve.

April 13, 2010

Pizza Pizza


When I was a kid and we used to go on long car trips, my mother had these harness-type seatbelts that she would strap us into that allowed us to stand and move around a little bit in the back seat. While I'm sure these seatbelts are exceedingly unsafe and no one would use them today (except my mother, who was always begging me to take the wee Soccer Monster out of his car seat and nurse him when he cried--she's old school, is my mom), they were great fun. The only problem with them was that they allowed my brother and I to move around enough to touch and bug each other constantly. (Now that I ponder it, what was she thinking?) So eventually, we would have to create that inviolable divide between us, an imaginary line down the middle of the back seat that neither one of us was allowed to cross. I had my side and he had his, and that was that. (For at least five minutes.)

What does all this have to do with pizza, you might ask? Well, if you live in the kind of household I do, in which one of your children eats no meat and the other essentially eats no vegetables (unless olives count), making a pizza that everyone enjoys can be a little tricky. That's when I invoke the spirit of my youth and create a line down the middle of the pie, with sausage on one side and none on the other. Bliss for everyone. Except for the caramelized onions, which I snuck in and which they both pulled off their slices while making extreme yuck faces. Ah, solidarity!

But really, what I want to post about is the pizza. It couldn't be easier. Make this.

I gave up on trying to make real pizza a long time ago, because it seems silly living in New York. My oven is not going to get to 800 degrees and I don't have a coal or wood burning hod, so that kind of pizza is out of my reach. But easy focaccia-style pizza? Why not? It only takes a few minutes of hands-on time. Seriously.

First you make a batch of no-knead bread dough. Then, sometime after its first rise (and it could be days later), you preheat the oven to 450, split it in half and stretch one half out in a well-oiled cast iron frying pan. Leave for 20-30 minutes, Top with whatever you like (mine had caramelized onions, whole canned tomatoes, olives, feta cheese, thyme, and sausage on one half), bake for 20 minutes, and voila!—it's a pizza.


Pizza
For the dough:
3 cups white flour
1/4 teaspoon yeast
1 tbsp salt
1 and 1/2 cups tepid water
mix dry ingredients together and then add water, mixing until shaggy dough forms. Cover loosely and leave in warm place for about 18 hours, or until doubled in size and surface is riddled with bubbles. At this point you can use it or put it in the fridge for a couple of days. It will actually taste better if you leave it in the fridge for a day.
To make the pizza:
Preheat oven to 450. Take the dough out of the fridge and divide in half. Put half back in fridge for another time. Oil a 9 or 10-inch cast-iron pan (or other heavy frying pan or baking pan) liberally with olive oil. Oil your hands. Take the dough and stretch and press it into pan. If it keeps springing back, stretch as much as you can, leave it for five minutes, and then come back and stretch some more.
Now top it. You can use sauce or just good quality whole peeled canned tomatoes straight from the can. Use a light hand with the topping. After all your toppings are on, drizzle with a little more olive oil and sprinkle with salt if your toppings weren't too salty. 
Slide pan directly onto floor of oven for 10 minutes (to brown the bottom) then move to center rack for another 10, until crust is golden and toppings are bubbling or browned.
Cool for a few minutes, slice, and eat.


April 8, 2010

Nice Neighbors


One of the things I love about my neighborhood is its friendliness. A few weeks ago, I gave someone from the neighborhood a parking space. We were vying for the same space and he wanted it so he wouldn't have to move his car the next day. I didn't care since I was using my car later that day anyway, so I let him have it.

In New York terms, that's very generous.

After that, he always made it a point to say hi when we passed, and then this morning, he actually came up to me as I was passing him on the street. He introduced himself, thanked me for giving him the parking space (only New Yorkers will understand) and offered me some eggs from the chickens he and his wife keep in their backyard. According to him, New Yorkers are allowed to keep up to 99 hens in their yards for personal use—but no roosters and no selling of the eggs or hens themselves.

Well, I am never one to turn down delicious, fresh, locally-hatched eggs,  and honestly, it doesn't get more local than this, unless I decide to raise my own chickens.

They keep three different breeds of chickens and he gave me two eggs of each. The middle ones, which are a lovely soft greenish-grayish-blue, come from their Araucana chickens.  They also keep Rhode Island Reds, which are reliable layers and I think must be responsible for the hearty large brown eggs on the left. The third breed is a black and white one whose name I've forgotten but whose fluffy feathers The Vegetarian loves to cuddle at fall harvest fairs. I'm assuming they produced the lovely cafe-au-lait eggs on the right.

I can't wait to show The Vegetarian the eggs and then fry one up for her in some fresh butter for dinner. She'll be in heaven. (Thank goodness she's not a vegan.)

And who says New Yorkers aren't friendly? Sure, I've lived here for ten years and seen this neighbor countless times and pass his restaurant daily, but never met him until now. And okay, he had to come up to me and finally introduce himself. But now we're friendly. Hey, anyone who keeps chickens in his backyard is the kind of person I would like to know. I guess I should have said hi nine years ago.

March 29, 2010

Dal

Or dhal.

Or dahl.

Or umpti.

It's got many different names and spellings.

This soupy lentil dish is a staple of Indian meals and a favorite in our house. We tend to like it thicker and more porridge-like than it is usually served, but that is the beauty of dal. Want it thinner? Add more water. Want it thicker? Boil it down. Dal can please anyone.

Dal is also the first thing I tell cooks new to Indian food to make, because it's simple and practically fool-proof. I make mine in the pressure cooker (Have I mentioned how much I love my pressure cooker?) because it cuts way down on cooking time, but any old pot will do.

There are almost as many ways to flavor dal as there are households in India, but my everyday one is pretty simple. Throw the dal, salt, some onion, some tomato, some garlic, some ginger, some chili, and some spices in a pot, add water, and cook till tender. Then add in some butter and simmer for another few minutes. I've never had a problem with adding salt at the beginning of the cooking process, but if you're one of those people who steadfastly believes that beans and dals will never soften if salt is added to the cooking pot, add it at the end. I don't mind.

Pictured above are three common types of dals. One you can get in almost any supermarket; the other two will probably require a trip to an Indian grocery store. 

Let's discuss them, shall we?

Masoor Dal
These are split red lentils and should be available in most grocery stores. They cook very fast (in around a half hour) and turn brownish-yellow when cooked. A great first choice.


Moong Dal
These are split and hulled moong beans and a popular north Indian dal. I buy these in an Indian grocery store. Like masoor dal, moong dal cooks quickly and turns yellow when cooked. While I do keep and make moong dal, it's not my favorite and in my opinion not worth specially seeking out, as I think the more widely available masoor dal is similar and tastes better.


Toor Dal
My hands-down favorite. Toor dal has an earthier flavor than the other two and lends itself well to assertive seasonings like asofoetida and curry leaves. Now that I have my pressure cooker (Have I mentioned how much I love my pressure cooker?), I mainly make this dal, but in the dark days I like to call B.P.C. (Before Pressure Cooker) I made masoor dal more often because toor dal takes a very, very long time to cook. That—and the fact that it turns more brown than yellow when it cooks—are its biggest drawbacks. It can help to soak the toor dal before cooking, but count on a few hours of simmering time with this one.

Besides these three, there are many other kinds of dal. Some, like urad dal and chana dal, I mainly use for flavoring. (They turn toasted and nutty when cooked in oil.) Other dal dishes are made from whole beans like garbanzos, red kidneys, or black-eyed peas.

What else can I tell you about dal? As I said, the possibilities are endless. Throw in more chilis or some ground red chili pepper if you want it hotter. Add tomatillos or green tomatoes and some brown sugar for a sweet and sour dal. Add coconut milk or shredded coconut. Fry up some spices in a hot pan and add it to the dal after it's cooked. (This is called a tarka.) My mother makes a wonderful dal with caramelized onions and ghee, or clarified butter. You can add any vegetable you want—carrots, daikon radish, squash, green beans—to make it a more well-rounded dish. Also, if you are out of a spice, don't worry. Skip it or try substituting some other spice. Since dal is cheap, it's worth playing around with it to see what you like. 

If you want to experiment, just remember that a little goes a long way. A cup of dry dal will make enough to feed four people as part of a meal.

Basic Dal
1 cup (or a little more) dal
I onion, diced
1 small can diced tomatoes
1 inch knob of ginger
2 garlic cloves (ginger and garlic can also be chopped if you aren't lazy busy like me)
1 whole fresh green chili pepper, with a slit cut in it
4 curry leaves or 1 bay leaf (optional--but hey, it's all optional)
1 tsp salt
1 tbsp ground coriander
1 tsp cumin
1 tsp garam masala
1/2 tsp turmeric

To Finish:
1-2 tbsps butter
chopped cilantro

Rinse dal, and then put it, together with salt, onion, tomatoes, chili, ginger, garlic, and spices in a pot. Rest your finger lightly on top of the dal and add enough water to reach your second knuckle.
Bring to a boil over medium heat, stirring occasionally. Then turn heat down and simmer, stirring every once in a while, until dal is done and whole thing turns soupy. If you like the consistency, add butter and cilantro and simmer for 5-10 more minutes. Otherwise, add water or boil down until it's the thickness you want and then add butter and cilantro.

Dal thickens as it stands, so if you're making it ahead, wait to adjust consistency and add butter etc. until closer to serving time.

There's a great blog with photos of how to make basic dal here. Finding obscure blogs like this one (or mine) are why I absolutely and totally love the internet.

Here's the finished dish, tho this is a terrible picture and I almost didn't post it because I was afraid it would scare you away from making dal.


But really, make it. 
It's easy.