September 7, 2011
The Eaten Path
Just had my second Thailand article published at The Eaten Path. This great website is run by my friend James Boo. Have a look and let me know what you think.


August 29, 2011
Seviche (or Ceviche)

I've always spelled it Ceviche, but this is a picture of my friend Omar's Seviche, and that's how he spells it.
I first heard about Omar's seviche when his wife Paola mentioned that they were going to a book party because Omar's seviche recipe had been published in this book.
(In the "small world" dept., also in this book are some recipes by the manager of the soccer monster's former soccer team, a man who was once unspeakably rude and mean and awful to us. Imagine my surprise when, looking through to find Omar's recipe, I came across this man's name and recipes. Oddly enough—or perhaps not so oddly—knowing he could cook improved my opinion of him.)
I've always had a funny relationship with ceviche (or seviche). I'm often not thrilled with the idea of eating it, and when I see it, it doesn't really look that appetizing to me. But then, when I take the first bite, it's usually unfailingly—and surprisingly—delicious. It's like rediscovering that I like ceviche, every single time.
Anyway, when I discovered that Omar's seviche was good enough to be in a cookbook, I was of course very intrigued and started
But you know what? When I eventually did get invited to their lovely home to eat Omar's seviche, it was the same as ever. I looked at the seviche, all beautifully plated like this:

And I just thought, "Wow, I'm not going to like this much!"
Boy was I wrong!
Omar's seviche is, I can say fairly unequivocally, one of the best things I have ever put in my mouth.
It's just a totally harmonious combination of ingredients—the sourness of the lime and lemon juice, the bite of the raw ginger, the crunch of the celery, the smoky hotness of the roasted jalapenos. All of these combined with the chewiness of the clams(he doesn't always put clams in, but he did this time) and the tenderness of the fish (he used tilapia) just made for amazingly happy mouthfuls. I couldn't stop eating it. We had the seviche on a gloomy, rainy sunday and the taste of it on my tongue just made the whole room seem bathed in sunshine. It's that good. Really.
As you can see from the picture above, he serves it with sweet potatoes and corn (and bread) which really turns it into a meal. And he also plates it beautifully on a piece of romaine lettuce. But you don't have to do either of those things. You can just make the seviche, leave it to marinate for a while (the longer the better) and then dig right into the bowl with a fork, transporting yourself directly to flavor heaven.
Not that I know anyone who would do such a thing.
Omar's Seviche
(serves 6)
2 pounds of tilapia or flounder
3 lemons
5 limes
salt to taste
2 stalks celery
1 2-inch piece of fresh ginger, peeled
1 red onion
1/2 cup chopped cilantro
2 jalapeno peppers
2 tablespoons olive oil
1 large can whole clams or 2 dozen shucked fresh raw clams or 3 dozen cooked and shelled Manila clams (optional)
3 sweet potatoes (optional)
3 ears of corn, (optional)
1) Slice the fish into 1/2 inch strips and put into a bowl. Add clams if using.
2) Squeeze the juice from the lemons and limes and pour over the fish.
3) Add some salt. (Go easy at first and add more later if you need it.) Let the fish "cook" 30 to 40 minutes in the refrigerator.
4) Finely dice the celery and red onion. Grate or finely dice the ginger.
5) Roast the jalapenos over a flame until the outer skins blacken and burst. Let sit 10 minutes, then slide the burnt skins off and thinly slice the peppers.
6) After the fish has marinated, add all the other prepped ingredients and mix. Let sit an additional 20 to 30 minutes before serving. The longer you wait, the richer the flavor gets.
7) If using sweet potatoes and corn, boil them while the fish "cooks." Cut the sweet potatoes and corn cobs in half and serve the seviche accompanied by half a sweet potato and half an ear of corn.
Eat and swoon!
July 25, 2011
Potato Parathas

It's hard to post if you don't cook. And I haven't been. But not because I've been worn out or disinterested. It's just that for the past few weeks I've been in the warm embrace of my family in Thailand. This means that I eat a lot of Thai food, either out at a restaurant, or brought in. Or that my mother cooks delicious meals for me. She loves to do it, and I, being a dutiful daughter, have to let her.
Or it means I eat delicious things like this:

These are vegetarian Burmese style noodles made by Goma, my parents' housekeeper, who is Burmese but of Nepali descent, and a strict pure-veg Hindu. She's always making delicious things and leaving them on the stove for us. As you might imagine, the Vegetarian loves Goma and has been in heaven.
But I've been sitting on this post for a while. For one thing, I love the ladies whose recipe I'm showcasing and have been wanting to give them a shoutout on my blog. For another, this post is a total counterpoint to the one I did on bao in which I extoll the virtues of letting other people make things for you.
In this case, I did the opposite.
I made potato parathas instead of buying them.
But, before anyone points a "j'accuse!" finger of hypocrisy at me, I will confess that I do usually buy them, on my Indian shopping sprees to Patel Bros. in Jackson Heights—about a dozen bags at a time. You see, potato parathas are a staple in my house. The kids can't live without them, and if they go a few weeks and there aren't any around, the whining will begin.
This winter, it so happened that I didn't get to Patel Bros. for months. Our paratha supply ran dry. The wee ones went into withdrawal.
I had to do something. So, inspired by these lovely ladies, I decided to try making my own.
I had avoided making filled parathas for years. It just seemed so hard, encasing the filling in the dough and everything. But you know what?
It was easy. Really, really easy. Here's the link to the recipe. And, now that I've done it a few times, a couple of tips:
1) the potatoes need to be really dry. I usually microwave mine or use leftover baked. If you boil them, drain as soon as they are done and put them back on the stove in the empty pan and shake the pan over high heat until they dry a little. If the potatoes are too wet, the filling will be too wet and it will ooze out of the paratha, making it impossible to roll the bread out and also making a big big mess. Trust me. I speak from experience.
2) If you can't find chaat masala, you can use another spice blend, or make your own. I have used both chana masala mix and sambar powder. I also add a few whole toasted cumin seeds to the filling.
3) a cast iron griddle (I use my cast iron tawa, or indian griddle, that I inherited from my mom) works great. These breads don't stick, but a little oil brushed on them during cooking improves the flavor immensely. As does a little butter or ghee put on top before serving. And keep the heat at medium, so that they can cook through before the outsides get too brown.
4) The first time I made the parathas with atta, Indian chapati flour, but then I ran out and, since I couldn't get back to Patel Bros. to get more (if I had, I would have just bought the parathas), I had to find a substitute. White whole wheat flour works very very well. I would give atta a slight edge, but white whole wheat flour is a) available almost anywhere, unlike atta, and b) can be used for other things as well.
5) Stack the cooked parathas in a covered container like tortillas and they will keep at room temp for a few hours and in the fridge for a few days. They even freeze beautifully. (Reheat in a toaster oven. This is a breakfast/snack staple in our house.) I've been on the lookout for a stainless steel lidded container like my Indian aunties use, but so far no luck. Here they are stacked:

But honestly, the first time I made them, I was amazed at how good and easy they are. They're very forgiving. Plus, they're nutritious—what with the whole wheat flour and potatoes and all.
I'm happy every time the soccer monster scarfs a couple up.
June 29, 2011
Pie Time

If it's not too hot to turn on my oven, June means strawberry-rhubarb pie for the Vegetarian and me. It's our favorite.
I was worried that this June would go by without us making one, because after a cold spring it's been hot as hades around here and we have all been super busy to boot.
But last week the urge hit us hard and I bit the bullet and agreed to turn on the oven. (which I then forgot to turn off for hours, all the while wondering why the house was so damn hot)
The filling for this pie is easy. Just some strawberries, rhubarb, sugar, and the the thickener of your choice. I like tapioca starch for most fruit pies except apple.
Then comes the crust. The Vegetarian really enjoys making crust—mashing it all up in the bowl with her hands. This one turned out a litte too short, mainly because I used some lard but then forgot to cut the quantities (Lard, not having much water in it, is purer fat than butter, so you really can't substitute 1 for 1 in recipes.)
Which brings me to the real purpose of this post, which is to rant about pie crust.
I think I must have made my first attempt at crust over 20 years ago. Since then I have made many, many pies and learned a few things along the way. I've also tried almost every trick out there—using vodka, or milk, or orange juice instead of water; using the food processor, or a pastry blender; sticking the bowl in the freezer every 2 seconds; adding cream cheese (one of the few that I adopted) or whatever.
And you know what I have decided? They are all beside the point. Pie should be simple and easy to make, and too many of these recipes fetishize it. In the "Pie and Pastry Bible" Rose Levy Berenbaum wants you to stick the crust ingredients in a ziploc bag, chill it heavily, and then mix through the ziploc, so that the warmth from your fingers doesn't soften the butter too much. It does make nice pie crust, and if that's what works for you, great. Go for it.
But I just think it's all too much trouble. Pie is something farm wives used to get up and bake by the dozen at dawn, to be served at lunch when the men came in from the fields. They didn't have freezers, or ziploc bags, or food processors, or vodka.
So here are a few of my personal thoughts on pie crust, for anyone who is just starting out:
1) Find a recipe that works for you and stick with it. I have a friend who makes very good pie crust using oil. It's never worked for me, but it works well for him.
2) Don't be afraid of the liquid. Beginning crust makers are often afraid to add enough liquid, because all the recipes exhort them to use just enough to moisten. Then they end up with a dry dough that they have to knead until it's the texture of cardboard. If you're new to crust-making, too much liquid is better than too little.
3) A combo of lard and butter makes a superior crust, but all butter makes a great crust, too. I don't like all-lard crusts because the flavor isn't as good. And I don't like shortening crusts that much. They leave a greasy mouth feel.
4) Use your fingers to mix the dough and, if you do it enough, you'll get a feel for what the proper texture and moistness should be. Most recipes suggest about a stick of butter (1/2 cup) for every 1 and 1/4 to 1 and 1/2 cups of flour. I like the more flour ratio because I prefer my crusts not to be too short—it makes them crumbly.
5) Even good pie makers create dud crusts every once in a while. Trust me. I'm known for my pie and I still make a less-than-stellar crust sometimes. (See pie photo above.) It happens. Just note what you didn't like about it and adjust the next time.
6) Unlike free-form tarts, pie is not a last minute thing. The making and baking of a pie usually takes close to 2 hours, and then most pies need another 3 or 4 hours to cool down. I actually prefer pie the day after it's made. Store it covered or in an airtight place (I use my microwave) but please don't put it in the fridge, unless it's a dairy-based pie. The fridge ruins the crust.
7) One great trick I did pick up from Rose Levy Berenbaum is to place your pie directly on the floor of the oven for the first 20 minutes or so of baking. This keeps the bottom crust from getting too mushy. Of course, put a baking sheet underneath it unless you want fruit syrup all over your oven.
8) For double crust fruit pies, don't forget to dot the filling with butter before putting on the top crust. This step, which might seem unimportant, actually adds a lot to the finished pie.
9) And finally, don't be afraid of pie crust and pie. Many cooks and bakers are. A summer fruit pie is one of the most delicious desserts known to man. Others feel the same about apple pie, and, while I make a lot of apple pies (see my post on the lard man) I have never taken to them the way I have to summer fruit and berry pies. And pecan pie, perhaps my favorite.
I am southern, after all.
June 20, 2011
Braised Beef Bao

I'm back! I guess my hiatus was longer than expected, but I needed a break. Mr. Coffee took over cooking duties for a while, though he didn't document them.
At first the kids were a little wary (the Vegetarian: "I don't think it's such a good idea for Daddy to do the cooking.") but they soon warmed up to the idea of having completely different dinners from the ones I made.
Then spring finally made a late appearance and my desire to cook came rushing back. So here I am.
Pictured above is my attempt to make a bao, or bun, sort of a la Momofuku. I was shopping at a giant Asian grocery store one afternoon and saw the buns in the refrigerated section and thought, "Why not?"
The standard filling is pork belly, but in the same market they were selling delicious looking pieces of boneless beef shin, so I bought that instead. I brasied it in some soy sauce, sugar, star anise, black vinegar, and ginger. Then I steamed the buns and piled strands of the brasied beef on there, along with some of the cooking juice, some cilantro, some quick pickles I made with persian cucumbers and rice wine vinegar, and some sri racha. I debated adding some peanuts, but decided against it.
The verdict? Mr. Coffee pronounced them delicious, tho he would have like the beef juices a touch sweeter. I think next time I'll go for pork belly, and buy some of the pickled mustard greens to go with.
The real revelation for me was how easy the bao are to use. I tend to sometimes get daunted by the thought of using something that seems complicated. But these just required a quick ten-minute steam and they were ready to go. I'm sure there are many people who would swear by making your own, but when I can easily buy these (with no more ingredients in them than the kind you would make at home—trust me on this—I'm an incorrigable label reader—that's why it takes me hours to shop.), I just don't see the point.
I used to fantasize a lot about being stuck out living in the country where I would be forced to cook and bake absolutely everything from scratch, but lately I'm in a phase where I truly embrace the idea that living in NYC means you happily get to let other people make certain foods for you.
Anyway, my main point is that if you have something delicious stuffed into a steamed bun at a restaurant and you think you can't do that at home, not because of the filling but because of the bun, you're wrong!
Get yourself to an Asian grocery store, buy some buns, steam away, and then stuff them with whatever you want.
You'll be happy you did. I promise.
February 7, 2011
Potato Salad

Today's post is about the humble potato salad. There are probably more ways to make potato salad than there are varieties of potato, which is saying something, as, according to Wikipedia, there are close to 4000 varieties of spuds.
This post is not for those of you who like an elegant salad, made of new potatoes boiled in their skins until just tender and then lightly dressed and gently tossed, sophisticated enough to sit alongside some cold poached salmon at a luncheon. I know there's a time and place for that kind of potato salad, but since I never serve cold poached salmon, I don't serve that kind of potato salad, either.
I really only serve one kind of potato salad. (Or maybe two, if you count the maharashtrian style potatoes with tomatoes and coconut that I sometimes serve room temperature on Indian buffets. But it's not really a salad, just a cold potato dish. There's a difference. I think.)
I serve a classic style, down home, southern potato salad, chock full of eggs, mustard, and mayo, with a little chopped pickle and some parsley thrown in. And some celery. Or celery seed if you prefer.
The potatoes can be any kind, but I actually like it best with regular whites or russets (though yukons do a fine job, too) because as you toss the salad the potatoes get smushed and their starch bonds with the egg yolk and mayo and mustard and forms this delicious creamy dressing that is close to heaven. This is the potato salad for those who secretly want to eat egg salad by the spoonful, but don't.
It's great at a barbecue, next to hamburgers, on a picnic. Last night I served it alongside NC style chopped barbecue sandwiches with coleslaw. It was perfect.
You can alter this potato salad to suit your tastes. My mother adds sour cream to hers. (You can take the lady out of Hungary, but you can't take the Hungary out of the lady.) I, being from the south, like a little sweetness in mine, so I add half bread and butter pickles and half regular dill pickles. But some people like all sweet pickles and some like all dill. Just don't use relish—it's not as good, unless you're in a total hurry and then it's an acceptable substitute. Also, a little minced sweet onion is a fine addition, but often I'm just too
Try it. Even if you're not Southern, it will bring you down home.
Potato Salad
3 pounds potatoes, boiled whole in their skins
2 sticks celery, diced, or 1 tsp celery seed
about 1/2 cup sliced pickled, diced
1/4 cup minced parsley
6 diced hard boiled eggs
1/4 cup mayo
1/8 cup mustard
vinegar (any kind but red wine or balsamic)
salt
pepper
Boil potatoes until done. Cool slightly, then peel off skins and cut into 1/2 inch pieces. Toss in a large bowl with a couple of tablespoons vinegar and about a teaspoon each of salt and pepper.
Add in celery (or celery seed), pickles, and parlsey and mix. Then mix in mayo and mustard. Mix well, then add diced eggs and mix well again. Egg yolks should sort of mix with the dressing and potatoes should be getting a little smushed.
Now taste. Add more vinegar, salt, pepper, mayo, or mustard as needed. If you like it on the sweet side, you could also add a little sugar. Mix again and refrigerate for at least an hour before serving. But don't serve it too cold straight from the fridge. It's best just slightly cooler than room temp.
January 30, 2011
Peanut Butter-Chocolate Chip Cookies

I love peanut butter in all its forms. On sandwiches, as ice cream, in cookies. I love peanut butter cookies, love their chewy sweet saltiness.
Unfortunately, my family doesn't. And, since I make cookies for my kids and not myself (I don't need to eat an entire batch of cookies), peanut butter cookies don't get made around here.
But the other day, rummaging around in my cupboard, I found an old jar of natural peanut butter and was struck with an intense desire to make peanut butter cookies. Besides, I had to do something with the jar. It was too old to eat on sandwiches, and my family hates natural peanut butter on sandwiches, anyway. (We're Jif extra-crunchy people.)
I figured I could seduce my family into the peanut-butter-cookie-loving camp by making peanut butter-chocolate chip cookies. Two great tastes and all that. We all love Reese's peanut butter cups.
I tooled around on the web and decided on this recipe. (Actually, I didn't tool around very hard, since this was the second recipe that came up when I googled "peanut butter chocolate chip cookies") The recipe was easy, which I liked, but what particularly intrigued me was the addition of two tablespoons of corn syrup to the dough. I suspected that the corn syrup helped keep the cookies chewy, since corn syrup is a moisture-retainer in baked goods. I was looking for a chewy cookie, because my kids definitely lean in the soft-baked direction. (Mr. Coffee prefers a darker, harder, crunchier, more caramelized cookie, but of course, once we had kids, what he prefers became irrelevant around here.)
So I made these cookies. And they came out pretty good. The kids loved them. Me, I didn't think they were peanut buttery enough, but perhaps that's why they were such a hit with the kids.
In the pic above, the cookies are from two different batches. The one on the left is from the first batch, the one the kids loved. The one on the right was from a second batch. In an effort to boost the peanut flavor, I added chopped peanuts to the top and baked them for a little longer, hoping to create some delicious caramelized toastiness. The peanuts on top ended up being a nice addition, but baking longer didn't really work with these cookies, because the corn syrup keeps them from getting a crisp, caramelized consistency. So they end up tasting slightly toasty but weirdly chewy. Underbaking for a soft cookie is the better way to go.
This recipe is definitely a winner with the soft-baked crowd, if that's who you're baking for. They're easy, and you'll be popular. They were devoured at my book group, too.
January 10, 2011
Cherry Strudel

When I was a kid, my mother used to make meggyleves—Hungarian sour cherry soup—quite a bit. I hated that soup. I didn't like cooked sour cherries, and I couldn't understand why anyone would want to eat a sweet fruit soup before a meal. I, who loved soup more than anything in the universe, used to push my spoon through the bowl and sigh. It just seemed so unfair!
Fast forward many, many years later. My dislike of meggyleves hasn't abated, but I have come to like cooked sour cherries—in pie and strudel, at any rate.
In the waning days of 2010, the first great NYC 21st century blizzard came roaring in and we were stuck at home for a few days. On Monday, still in denial about just how stuck at home we were, I began making cherry strudel to take to dinner at a friend's that night. But with no subway, or bus, or car—or even car service—we were not making it all the way to Bed Stuy.
I hadn't made cherry strudel in a while, and I had forgotten about what a dream the dough for it is. This isn't filo dough (I didn't have any in my freezer) or the authentic studel dough that you stretch out over a floured tablecloth (though I would like to try making that sometime). Instead, it's a sinfully rich sour cream-butter dough that my mother-in-law taught me. The dough comes together quickly, since you just mix all the ingredients in, but then it has to sit in the fridge for at least two hours. It requires planning ahead, but then, so does filo, since it has to be defrosted.
I made the dough. I made the studel filling. Which was good but not great, because the canned cherries I used were subpar. Do yourself a favor and get jarred morello cherries (You can find them at Eastern European stores.), which are much better than watery canned sour cherries.
After I realized we were snowbound and going nowhere, I put both dough and filling in the fridge and forgot about them.
However, my mother-in-law is in town, and the other night she came over for dinner. Scrounging around for dessert, I came across the strudel makings and decided it was the perfect time to bake them. With the dough and filling already made, it took me less than 15 minutes to get them into the oven. The results were pretty darn good.
Better than sour cherry soup, at any rate.
Cherry Strudel
For the Dough:
2 cups flour
2 sticks soft butter
1 cup sour cream
half teaspoon salt
• mix all ingredients together in a bowl with a wooden spoon. Shape dough into a flat oval and wrap in plastic. Refrigerate for at least two hours or up to three days.
For the filling:
2 jars sour cherries, liquid drained out
half cup almond flour
half cup bread crumbs
quarter cup sugar
half a stick of melted butter
• mix all ingredients together and set aside.
To assemble:
1. preheat oven to 375.
2. Take out chilled dough and divide into four pieces. Keep one piece out and put others back in fridge. Roll the first piece out on a floured board into a thin 8-by-12-inch rectangle.
3. Spread a quarter of the filling in a 3-inch wide line across the width of the dough, leaving a one-inch border at the wide end and at the two long ends. Then, starting at the end with the line of filling, roll the dough up, width-wise, tucking in the sides. Place the dough, curved into a full-moon shape, on a greased cookie sheet.
4. Repeat with remaining three piece of dough and rest of filling, placing finished strudels on the same sheet. If desired, brush tops and sides with melted butter. Cut four slits into the top of each strudel.
5. Bake until strudels are golden brown, about 35-45 minutes. Let cool slightly, then dust with powdered sugar before slicing and serving.
December 20, 2010
Moghrabieh (or Mograbeyeh)

Can I talk to you about moghrabieh? Also spelled mograbeyeh. And mograbieh. A.k.a. Lebanese couscous and Syrian couscous.
For those of you familiar with Israeli couscous (which I am not) perhaps moghrabieh won't seem so foreign. But for those, like me, who only ever use the pin-head sized couscous, moghrabieh is a whole 'nother country.
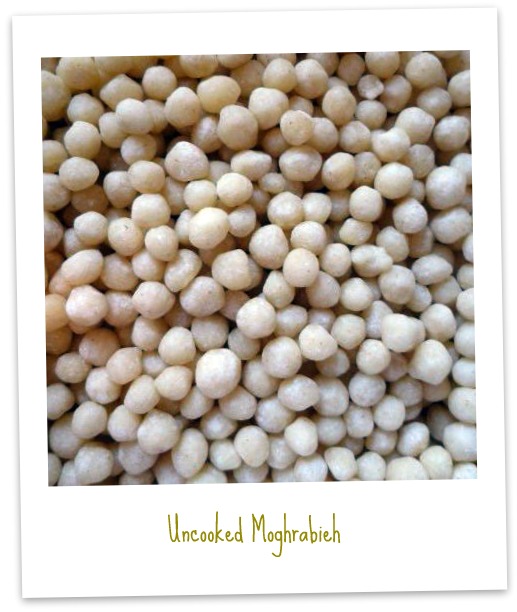
What is it? Well, as the photo above shows, it's slightly irregular balls of buckshot-sized pasta.
What the photo doesn't show, however, is the fantastically chewy nature of these little beasts. Moghrabieh is incredibly starchy, so much so that, if you want to cook it pilaf style as I tried to, I would recommend parboiling it first to get rid of some of the starch.
Not that it wasn't a hit at my house. It was. But it had the just-ever-so-slight "fish eyes in glue" tapioca pearl-bubble tea texture. This is a beloved texture chez moi, so we were good with it, but for those who aren't, I'm just sayin'—parboil.
Nosing around on the web, I came up with a recipe that used it in soup, which seemed like a shockingly simple and good idea. All the starch these little balls give off would serve to thicken a soup and give it body. So I dumped my leftover moghrabieh into this soup recipe, except that I accidentally added curry powder instead of cumin and then thought "what the heck" and threw in a few handfuls of dal and added some leftover homemade cilantro-garlic paste from my fridge. (I love to use up leftovers.) But I'm sure the recipe is great as is, so go ahead and make it. The Vegetarian loved this soup, and I added some diced spanish chorizo to my bowl to satisfy my carnivorous lust.

Another moghrabieh recipe that intrigued me was this one. Also, I think if you steam it for, like, two hours, you can use it like regular couscous.
And I'm thinking of using it instead of nokedli the next time I make chicken paprikas. Mainly because my cousin borrowed my nokedli maker and hasn't returned it yet. (I have lots of cousins, but if you're reading this, nokedli-maker-borrowing cousin, you know who you are.) Nokedli, for those of you who are not Hungarian, are the spaetzle-like dumplings that get served with chicken paprikas and, if you're my kids, are the only reason for having chicken paprikas, really.
So there you have it. Moghrabieh.
Try it. You'll like it.
December 11, 2010
Pozole

Well folks, it's another one of those "I love my pressure cooker" posts. Today it's all about pozole, which the Soccer Monster enjoyed so much, he ate it for breakfast, lunch, and dinner for two days.
Before those of you who don't have pressure cookers roll your eyes and turn away from this post, let me assure you that making pozole is just as easy without a pressure cooker. It merely takes much, much longer. And that time issue is frequently what keeps me from making something. If I'm trolling the aisles of the grocery store at 3 pm and think of making pozole and realize that it takes at least 2 hours, I'll probably pass. But if I think it could take an hour or less, I'll go for it. So that's why I love my pressure cooker.
But enough about my beloved companion. Let's talk pozole. This recipe is so easy and so absolutely scrumptious, once you've made it, you'll wonder how you've gone all these years without it.
Also, as is true of many of my favorite recipes, it's a one pot meal. Easy, with less clean up. Love the one-potters!
I used canned white hominy in this recipe, and while traditionalists might disdain it, it seems to work just fine. I'm sure if I took the trouble to cook my own (and I will one day) I would have a revelation and vow never to go back to the canned stuff again, but right now the canned stuff suits me just fine. It's kind of like beans—sure, dried ones are better, but using canned is better than not eating beans at all.
The really important thing about this recipe is the pork. Chunks of boneless pork shoulder or boneless country-style ribs work best here—other cuts will be tough. However, be sure to trim as much fat as you possibly can off the pork before cooking it. Otherwise, the broth will be too fatty and you will have to defat it, an extra step that—egads!— uses up more pots and pans.
Traditionally, pozole is served with lots of garnishes—diced radishes, diced onions, more oregano, avocados, sliced cabbage or lettuce, lime, sliced jalapenos, and cilantro—which can add considerably to your prep time. If you want to streamline, you can skip most of the garnishes. I skipped the cabbage, onions, oregano, and avocados this time, and you can skip the radishes and jalapenos. But the cilantro and lime do add important finishing touches.
Really, make this for dinner tomorrow night. Your family will sigh with pleasure and thank you.
Mine certainly did.
Pozole
1 onion, diced
1/2 green pepper, diced
1 jalapeno, seeded and diced
2 cloves of garlic, minced
2 tablespoons olive oil, regular oil, or lard
1 and 1/2 pounds boneless pork shoulder or country-style ribs, trimmed of all fat and cut into smallish chunks
1 tablespoon cumin
1/2 teaspoon oregano
1 tablespoon salt
1/2 teaspoon pepper
2 large cans white hominy, drained and rinsed
1/4 cup minced cilantro
1 can chicken broth
lime wedges and more minced cilantro, for garnish
In a pressure cooker or soup pot, heat oil or lard and saute onion, green pepper, and jalepeno until softened. Add garlic, pork, spices, salt, and pepper. Add water just to cover. Bring to a boil, cover pan, and simmer until pork is almost tender—about a 1/2 hour in the pressure cooker or an hour in a regular pot.
Take off lid, add hominy, cilantro, chicken broth and re-cover. Simmer for another 20 minutes to 1/2 hour in pressure cooker or another 45 minutes to an hour in a regular pot. Make sure pork is tender and check for seasoning. Ladle into bowls and serve with lime wedges, cilantro, warm corn tortillas or tortilla chips and, if desired, sliced jalapenos, shredded cabbage or lettuce, diced radish, sliced avocados, diced onion, and more oregano.
*This dish is great reheated the next day, but the hominy will continue to absorb the soup broth as it sits, so you may need to add more broth or water before reheating.
**You can make this with chicken instead of pork. But you will have to make and strain broth ahead of time and take meat off bones and shred. You could probably make it with boneless chicken and canned broth, but it would not be as good. I think the mix of pork and chicken broth works best.
November 6, 2010
Soupe Au Pistou

The regular basil had been reduced to a few sorry, straggly strands, but there was still a little bit of thai basil left. So I squelched traitorous thoughts of delicious thai drunken noodles redolent with spicy thai basil and picked all the basil that was left, thai or otherwise. I mean, I knew that motherhood meant sacrifice, but I didn't realize how much that sacrifice would extend into my kitchen. The last bowl of soup? It's yours. No onions in that sauce? Well, okay. No mushrooms ever, in anything? Hmm, I'll have to think on that. Take my firstborn instead. Oh wait, you are my firstborn. Never mind.
I figured that, topped off with parsley and mixed with loads of garlic and parmesan and swirled into soup, the anisey flavor of the thai basil wouldn't be so noticeable.
And you know what?
I was right.
This soupe au pistou is not particularly traditional, made up on the fly as it is and all. But it is in keeping with the spirit of these kinds of soups, which are all about turning the season's bounty into a bowl of steamy, delicious goodness.
I would also post about the super-delicious thing I did with the rest of that zucchini, but of course I forgot to take a picture of it. Fortunately, zucchini is still around, so maybe next time.
Soupe au Pisou
(makes about two quarts)
for the soup:
1 onion or leek, finely chopped
2 carrots, peeled or scrubbed and cut into 1/2 inch dice
1 stick celery, cut into 1/4 inch dice
2 potaotes, peeled and cut into 1/2 inch dice
1/2 pound green beans, trimmed and cut into inch-long pieces
(I used 1/2 green, half yellow wax beans)
1/2 bunch cavalo nero (tuscan kale) or regular kale or any other green you like, cut into thin ribbons
1 medium zucchini, cut into 1/2 inch dice
1 cup cooked beans (I used canned chickpeas, but you could use anything, really, except perhaps black beans)
1 sprig thyme
olive oil ( or butter or bacon fat—your choice)
water or broth
for the pesto:
1/4 cup packed basil leaves
1/4 cup packed flat leaf parlsey
2 cloves garlic
1/2 cup grated parmesan
olive oil
In a stockpot or large heavy saucepan, saute onion and celery with a quarter teaspoon salt (and a half teaspoon crushed red pepper, if you like) in oil until soft. Add remaining vegetables, beans, thyme, a 1/2 teaspoon salt, and cover with water or broth. (should be about 6 cups of liquid). Bring to a boil, then reduce heat to simmer and cook, covered, until vegetables are tender. Salt and pepper to taste.
While soup is cooking, make pistou. In a blender or food processor, process basil, parsley, garlic, and cheese until the mixture is fairly smooth. With motor running, add olive oil a little at a time until a thin pesto-like consistency is reached.
Serve soup with a tablespoon of pistou swirled into each bowl. Pass extra grated parmesan, if you desire.
October 14, 2010
Freekah Salad

Can I talk to you about freekah? Yes, it is freaky. Freakily good, that is.
Freekah (also spelled freekeh and frikeh) is wheat that's been picked while green and then smoked. Cooked, it tastes like a smokier, nuttier wheat berry. If, like me, you happen to love chewy grains, then I urge you to try it. While it may not be on the shelf at your local supermarket, it shouldn't be terribly hard to find. Middle Eastern stores should carry it. I get mine either at Sahadi's on Atlantic Avenue in Brooklyn or at the local greenmarket. The greenmarket freekah is superior to the boxed kind, and, not surprisingly, twice the price. Compared to other grains, freekah is expensive. But it's worth it.
If you google for freekah recipes, you will come up with a lot of stew-like dishes made with lamb. However, I love chewy whole grains served as room temperature salads, so I decided to make one up. While I cooked the freekah in my pressure cooker (HIMHMILMPC?) I roasted some cauliflower and cut up a leftover artichoke heart I had in my fridge. Then I mixed the warm, cooked freekah with the veggies, some crushed raw garlic, olive oil, lemon juice, and chopped fresh herbs. The herbs are key. They take the salad right over the edge into amazing deliciousness.
This salad is best at room temp but can be made a few days ahead and kept in the fridge until you want to serve it. Of course, the Vegetarian loves it and will take it for lunch all week.
I like the combo of the cauliflower and the smoky freekah, but you could use any vegetable you wanted, really. Also, feel free to add in some feta cheese or some olives or anything else you're inspired to. I'm giving the recipe below without the artichoke heart, because I don't think it's worth cooking an artichoke just for this (and I don't think the canned/jarred ones are good for this—too vinegary). But if you happen to have an extra steamed artichoke lying around the fridge (something that's only happened to me about once in my life, and you're looking at the results) by all means, add it.
So the salad recipe is just a guideline. Mainly, I wanted to spread the gospel about freekah. Try it once, and I promise that, like me, you'll be hookah.
Freekah Salad with Roasted Cauliflower
2 cups freekah
1 head cauliflower (small, medium, or large—it doesn't matter)
1 clove garlic, pressed or minced
olive oil
juice from one lemon
1-2 cups mixed fresh herbs, some combination of parsley, cilantro, dill, and mint.
salt and pepper to taste.
Preheat the oven to 400.
The freekah is cooked like brown rice. Put the freekah, five cups of water, 1 tsp of salt, and 1tbsp of olive oil in a large, heavy saucepan. Bring to a boil, stirring occasionally. Cover tightly, lower heat, and simmer for 45 minutes, until water is absorbed and grains are chewy but still tender.
Meanwhile, cut the cauliflower into florets, toss with some olive oil, salt, and pepper, and spread in a single layer on a baking sheet. Roast, stirring occasionally, until the cauliflower is tender and caramelized.
In a bowl, mix cooked freekah with roasted cauliflower, garlic, and lemon juice. (start with the juice of half a lemon, taste, and add more if you like it more acidic.) Add in herbs and toss again. Let sit for at least 1/2 hour before serving, so flavors can mingle.
October 7, 2010
Carolina Seafood Feast
While my family was here this summer and I wasn't blogging, we went to the beach in North Carolina for two weeks. A beach vacation in North Carolina is a family tradition—we've been going since I was a kid. It made more sense then, when we lived in North Carolina, but even now, the beaches are so nice and the whole vibe so relaxing that it's worth making the trek down from Brooklyn.
For me, one of the main attractions of the NC beach is its warm water—no matter how long I live in the Northeast, I never get used to the cold ocean up here. People up here always say that it's refreshing, or that they don't like too warm "bath" water, but I think that's a bunch of rationalizing hogwash. Warm water is better—you can frolic in it all day long, and if these same people are so set on their "refreshing" water, why do they go to Miami, or the Caribbean, or Mexico? Do people spend time in St. Bart's thinking, "I wish the water were cooler?" I don't think so.
Anyway, all of this is just to say: imagine my surprise when we arrived at the NC beach this summer and the water was—cold! Not just cool, but a toe-numbing cold, a less-than-60 degrees F cold.
The culprit was something called a "coastal upwelling" in which winds push the warmer surface water away and deeper, colder water rises up to replace it. Upwelling, upschmelling, all I know is that it almost ruined my beach vacation. I had never spent two weeks at the beach before and was really looking forward to it, but somehow it wasn't the same when I was reluctant to go in the water.
Anyway, the point of all this is that, instead of swimming, a lot of cooking and baking got done (mainly by my mom, but some of it by me). And that's why you're reading this, right? To hear about the food.
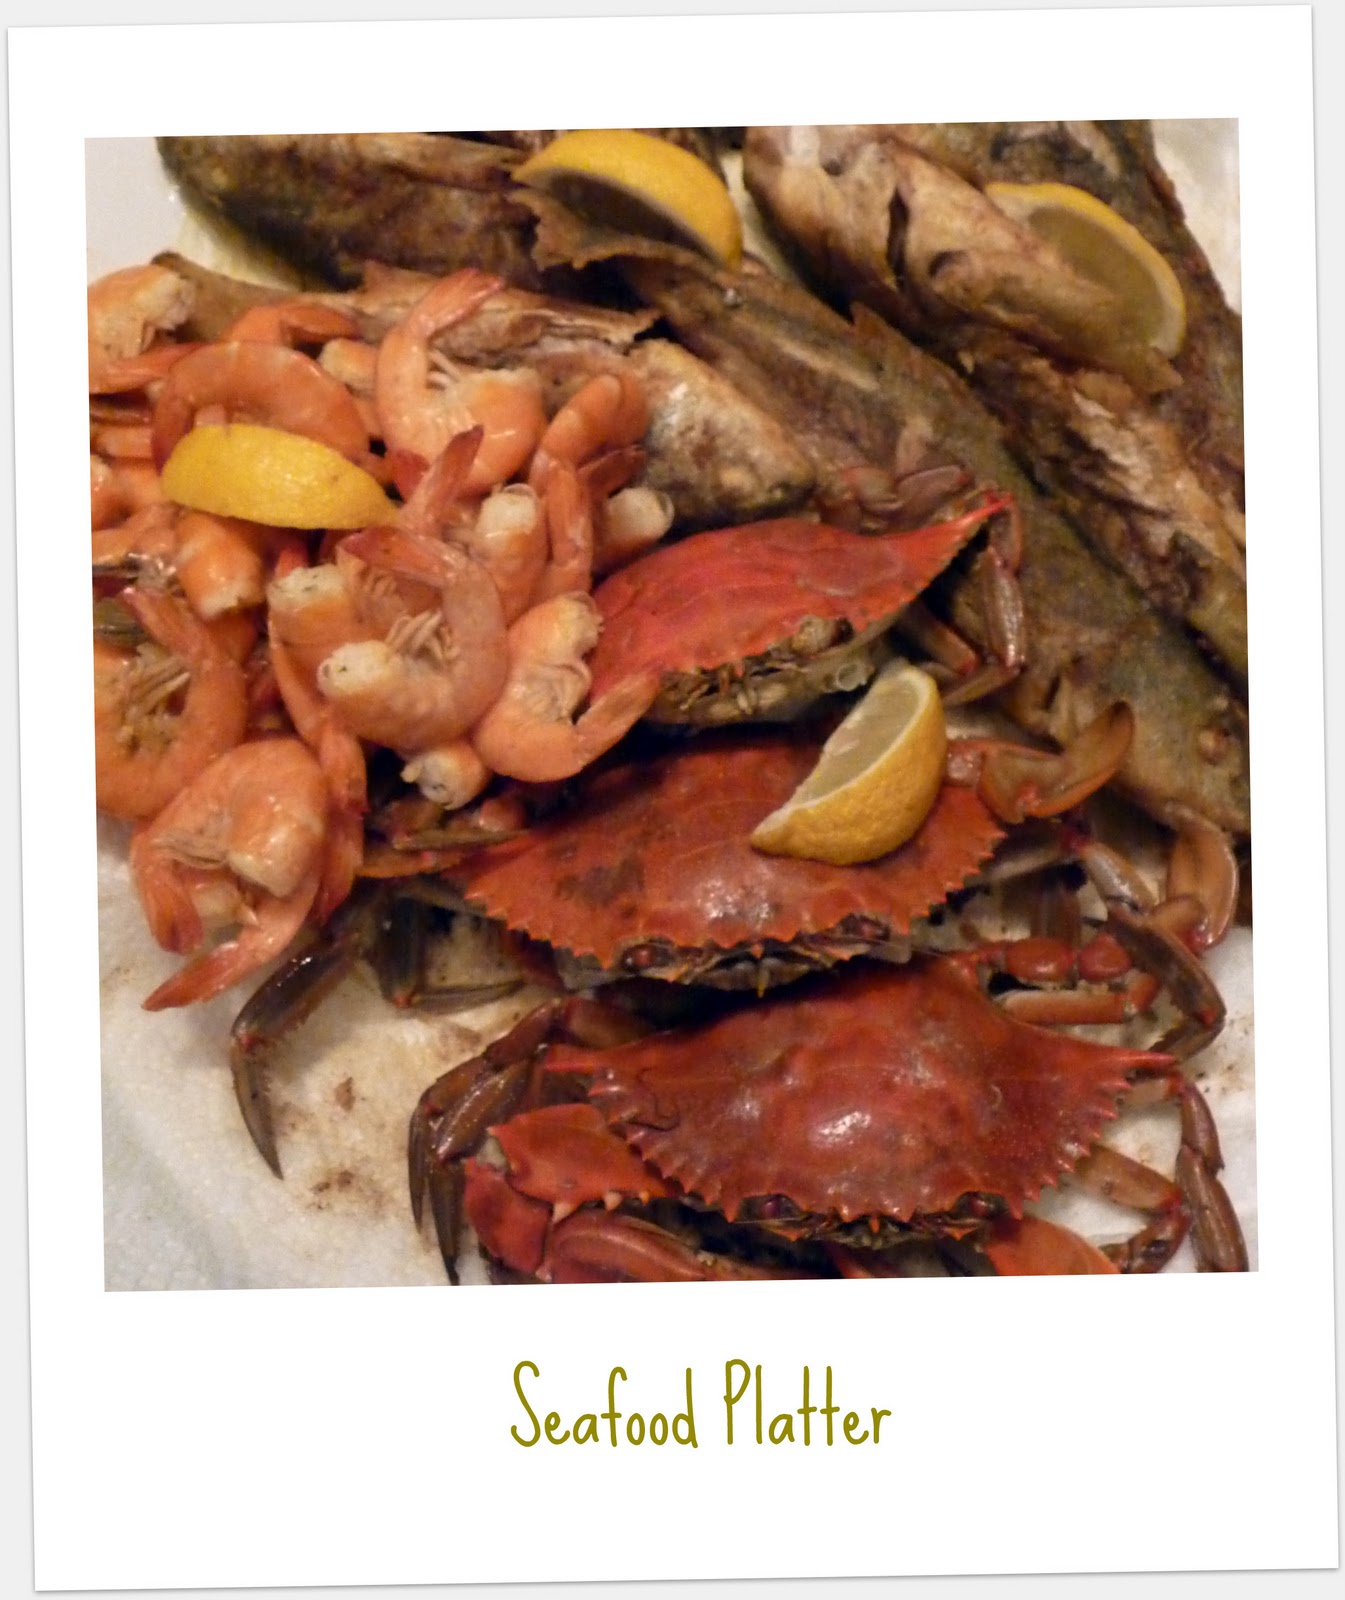
The pic above shows my version of a Carolina seafood platter. I love the fresh shrimp that you get down there, and the crabs. And I like them best just boiled up with some Old Bay or other seafood seasoning. (Here we used some house brand that the fish store had.) Peel-and-eat fresh shrimp and some crabs, what could be better? Well, most of my family doesn't like shrimp. Or crab, apparently. Too much work, they all say.
So thank goodness for the fish. My brother was out surfcasting every dawn and dusk, and one pleasant side effect of the cold water was that he caught a lot of fish. And I mean a lot. He had two hooks on each of his poles (In case you haven't figured it out, my brother is one of those fishing-crazy guys. Weird, I know, but it takes all kinds.) and sometimes the Soccer Monster and his cousins would be fishing with him and they would cast their lines and pull in a fish on each hook less than a minute later. My brother threw three quarters of the fish he caught back and we still ate fish almost every morning, noon, and night. My mother usually fried them, which is how you see them on this platter, but towards the end we started to grill them, and I prefer them grilled, I think.
To go with the seafood platter, my mother made this, a classic Hungarian dish and a childhood favorite of mine.

Then, the next day, I made these with the leftovers and everyone raved about them.

Of course they raved, because these were incredibly time-consuming (though not difficult) to make, what with picking the leftover crab out of the shell and all. It's not my favorite ratio, the "time spent preparing food:wow factor" one. I have some quick dishes that really wow, but the world needs more of these, especially for us lazy busy cooks.
I'll leave you with a recipe for the cabbage noodles, because, trust me, you don't want to make the time-consuming seafood cakes and the platter is so simple, it doesn't need a recipe. And besides, these noodles are delicious.
Hungarian Noodles with Cabbage
1 medium head green cabbage
1 pound wide egg noodles
1 stick butter
4 tsp sugar
salt and freshly ground black pepper.
1) Shred cabbage, place in a colander, and sprinkle liberally with salt. Leave for at least 15 minutes. Then rinse, shaking colander to get rid of excess water.
2) In a heavy saute pan, melt the stick of butter. when foam subsides, add sugar and stir till it begins to caramelize, turning a light brown. Add cabbage and stir for one minute, or until cabbage begins to wilt a little. Then lower heat and cook cabbage, stirring frequently, until it is soft and brown, about 15-20 minutes.
3) Meanwhile, bring a pot of water to a boil and cook noodles according to package directions. (Or, if you're me, cook them a minute less than the package says.)
4) When cabbage is done, add cooked, drained noodles to it and mix. Grind on lots of black pepper and salt if needed. Mixture will be dry, but if it seems too dry, add in another tablespoon of butter and some pasta cooking water.
Makes a great buffet dish, as it's good at room temperature as well.
October 1, 2010
Rainy Day Meatballs

Okay, so I haven't posted for almost two months. I didn't think I was going to take the summer off, but it just kind of happened. My family was here from Thailand. We went on a bike trip. The Soccer Monster started middle school in Manhattan (and joined his third—count 'em, three—soccer team), which meant adjusting to 6:30 am mornings. (Those of you who know me well will know how hard this was for me.)
But now I'm back. And playing around with my photos. This is the polaroid look. Do you like it?
And cooking. Trying to do lots of cooking, though as the kids get older and their days get busier, it gets harder. But I'm tryin'.
It's rainy and gray here today—has been all week. One of my favorite things to make on a drizzly, wet, stay-at-home-all-day day is meatballs in tomato sauce. This dish is a real example of how my neighborhood has changed me. Before I moved to this Italian-American neighborhood, it would never have occurred to me to make meatballs. It wasn't something I ate when I lived in Italy. I didn't even like them that much.
But then one day I tasted my friend Emma's meatballs. She's an old-school Italian-American gal and a mean cook. Her meatballs hooked me. And besides, the soccer monster likes them and will eat a lot of them. And whatever that scrawny bag of bones will eat a lot of gets made often in this house.
When I first set out to make meatballs, I went for the complex everything-but-the-kitchen-sink approach. Tons of stuff went into them. Parsley. Ricotta Cheese. Fresh Garlic. Diced pancetta or bacon. But I soon gave up that approach because
a) It was too complicated and usually required two trips to the store. (The second trip was to pick up what I forgot the first trip.)
and
b) The kids didn't like the fancy meatballs so much. (This was back when the Vegetarian wasn't a vegetarian yet.) They didn't like the parsley, or the bite of the fresh garlic, etc, etc.
And while I hate to cater to annoying kids with unsophisticated tastes, this is, of course, exactly what I do most nights. And besides, I am a lazy busy cook, and those complex meatballs were killing me. After mixing up all those ingredients, I fried the meatballs on the stove and then carefully placed them in a pot of made-from-scratch tomato sauce. I'm not saying those meatballs weren't good, but were they worth it, in the time vs. outcome sense? Not to me, anyway.
So behold, my rainy day meatballs. Simple ingredients, simple process. Though they do require several hours in a hot oven, there's very little hands-on time. It will take you longer to read this recipe than it will to make it.
Honestly, they couldn't be easier.
Rainy Day Meatballs
2 pounds ground meat (I like a beef, pork, veal combo best, but you can use anything you like. I've never tried it with turkey or chicken, but they should work, though they might be a little dry. This def works best with meat that has some fat in it, like ground chuck.)
2 slices bread (white or whole wheat, supermarket sliced or artisan—doesn't really matter)
1 cup milk
1 egg
1/2 cup parmesan cheese
1 tsp garlic powder
1 tsp onion powder (optional)
1 tsp fish sauce (optional)
1/2 tsp dried oregano (optional)
1/2 tsp dried basil (optional)
salt and pepper
olive oil
crushed red pepper flakes (optional)
one 28-oz can crushed tomatoes or one box pomi strained or chopped tomatoes or similar amount of tomato sauce or other tomato product
Preheat oven to 400.
Crumble the bread into a bowl and pour milk over it. Let it sit until bread is completely soaked and can be crumbled into a paste with the milk.
Add the ground meat, egg, cheese, garlic powder, onion powder (if using), fish sauce (if using—I add fish sauce to a lot of tomato-based things; it adds some extra umami punch.), oregano, basil, and salt and pepper. Season very liberally. Taste mixture and adjust seasonings as necessary. (If you're wimpy about tasting a raw ground meat mixture you can fry a mini meatball up in a pan, but I am too lazy busy to bother with such things. I've been tasting raw ground beef mixtures for years now and I'm still here, but hey, we all make our own choices.)
Liberally oil a shallow saute pan or a casserole pan with a lid. Make golf-ball sized meatballs with the meat mixture (or any size meatballs you want, really) and place in the oiled pan.
Place pan, uncovered, into hot oven and cook until meatballs are fairly brown, about 45 minutes.
Take pan out and carefully pour tomatoes over and around meatballs. Season tomatoes liberally with salt and/or crushed red pepper and/or some fish sauce. Carefully try to mix the seasonings in, but don't worry too much if you don't do a good job of it.
Cover the pan and put back into the oven. Reduce oven temperature to 375 and cook for about an hour. If you want, you can baste meatballs with sauce occasionally during this time, but it's not really necessary.
Take pan out of oven. Mix sauce around and then taste it and adjust seasonings. Uncover pan, put back in the oven, and cook for about a half hour longer, or until sauce is thickened and meatball tops are browned.
Garnish with fresh basil leaves and serve with seeded Italian bread. Or over pasta.
July 8, 2010
Thai Food #3 (Seafood)

Apologies for going so long without posting. My family arrived from Bangkok, Mr. Coffee's mom came in from the Midwest, the Soccer Monster graduated from 5th grade (gulp!) so June was one long emotional and logistical jam, where I barely had time to think, never mind post. But the Soccer Monster, who follows my blog religiously (Isn't that why we have kids—to have some fans?), has been bugging me about posting, claiming that if I go over a month I will lose all my readers and will never be able to make a fortune off my blog. That kid has dreams of glory and I hate to tell him that I only have about four readers, all of them related to me (It's better if he finds out on this blog, isn't it?), so, sufficiently chastised, I have sucked it up, wiped the sweat off my neck, and settled down at my furnace-like desk to post.
So I'm back. And, as promised, here's the last of my three posts about Thai food. This one focuses specifically on seafood, which we eat a lot of in Thailand because a) my SIL is crazy about seafood, and b) Thais in general seem to eat a lot of seafood and so there is a lot of it around.
The pic above is of garlic stir-fried langoustine-type shrimp. Utterly delicious. We got them at a restaurant near the beach where we took our fateful, near fatal, rafting trip. The food was so good, we ate there for lunch and then again for dinner. This is the place I was talking about in my last post (oh so long ago) when I said that two of the three great meals from last summer were in the same place.
The restaurant was set over a manmade pond and had lots of bins with live seafood sitting around, waiting to be cooked. Here are a few of them:

Shrimp/Langoustine/Crayfish Thingies

Crabs. My personal favorite. Curried crab is one of my top fave dishes of all time.
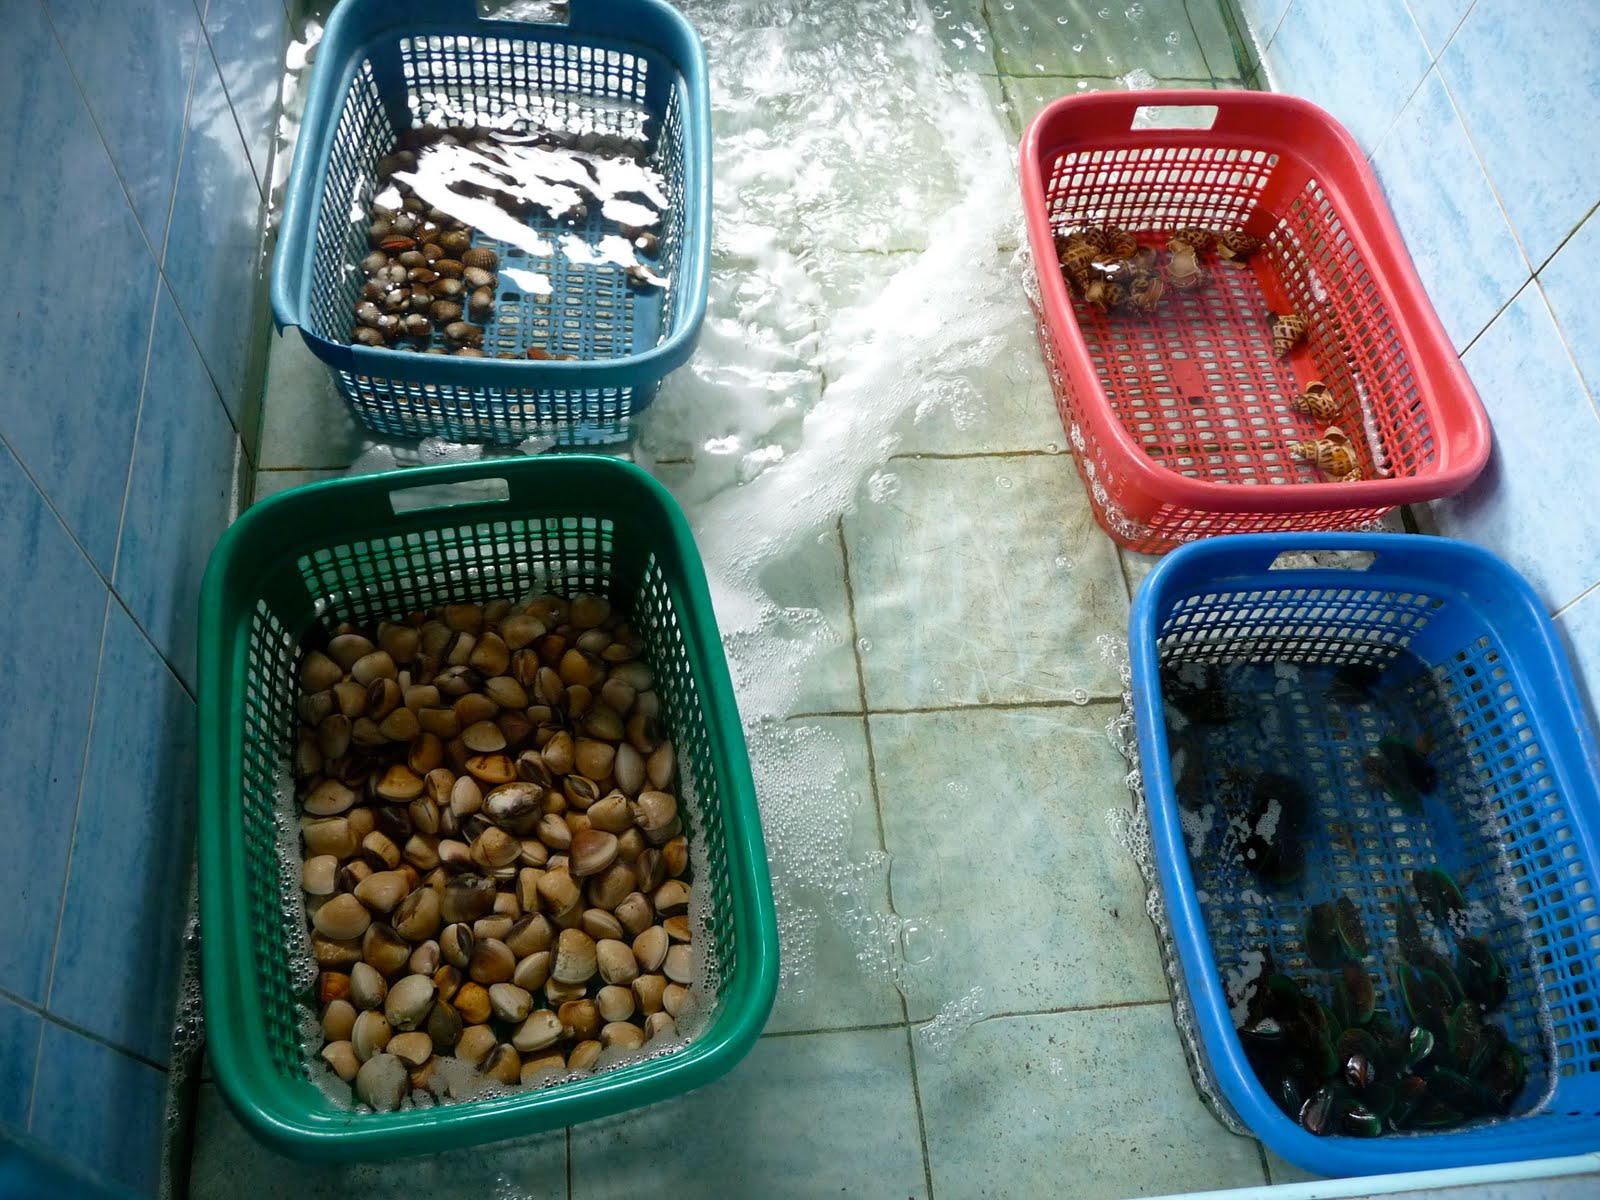
Small clams, mussels, snails. I don't like the snails too much, but I love the clams and mussels.
Here are some of those items, cooked:

The mussels are those crazy green-lipped new zealand ones, which is what they have in Thailand. The first time I saw those was almost 20 years ago on Koh Phi Phi (one of the most stunning islands in the world, though it's been ruined by overdevelopment) and I was blown away by the electric green color bordering their shells. They are beautiful to look at and quite delicious, but I think a tad less tasty than the Canadian mussels we get here in New York.
The clams are sauteed with chili and basil, which is not my favorite prep, but is still good.
However, what I really want to point out are the two small bowls of dipping sauce in the lower right corner. This sauce is known as nam jim and is the most scrumptious thing in the entire world. Seriously, you could eat nails with this stuff. Which is crazy, since the sauce is incredibly easy to make and consists of about 5 ingredients: fish sauce, lime juice, chilis, garlic, and a pinch of sugar. Try making it and tossing some freshly cooked seafood in it. You'll think you died and went to heaven.
And here are some other seafood/fish dishes we had at this same restaurant. Just thinking about them now, almost a year later, is making my mouth water. Maybe all these Thai food posts were a bad idea.

Curried crab. Not the best version I've ever had, but not bad. To me, curried crab is like a hamburger. There are good one and there are less good ones, but there really are very few bad ones.

Whole fried fish. Or is it steamed? I can't tell from the pic and I honestly can't remember. But either way, a forkful of the fish flesh dipped in the nam jim is sensational.

Another crab dish. We order this kind of thing for my dad and my older nephew, who have what we call soft mouths, ie. they don't like/can't eat spicy food.
And here are many of the dishes all together, in their glory, half-eaten on the table. I wish I could transport myself back there right now.

That stainless-steel volcano-looking pedestaled thing is how they serve soup at most places in Thailand. Inside was a very delicious tom yum soup, a bowl of which is now my masthead.
So there you have it. Thai seafood is a) plentiful, b) delicious, c) in general, prepared fairly simply (curried crab and tom yum being exceptions), and d) always good if eaten with the world's most delicious dipping sauce.
Next up, Indian food! It's been too hot to cook around here, so I will be trotting out some old photos of Indian meals and discussing them. And, if I remember to bring my camera, perhaps some pics of the Indian meal my mom is making tomorrow night in cool, air-conditioned New Jersey.
June 8, 2010
Thai Food #2

In this post I thought I would talk about restaurants in Thailand, and a couple of dishes that I've had there but never found here in the U.S.
Every visit I've made to Thailand, there has been one restaurant meal that has been indescribably delicious. Actually, there are usually many, many meals that are indescribably delicious, but there's always one that stands out. A couple of times, it has been a meal at the Seafood Market on Sukhumvit Soi 24 in Bangkok, which is a big, cavernous restaurant where you first shop for your seafood and then give it to your servers and tell them how you want it prepared. Bangkok chowhounds dismiss Seafood Market as touristy and overpriced (which it is) but it does make the best version of curried crab I've ever had, which is what I go there for. I hear there are even better versions in Singapore and Malaysia, but I haven't had them.
Usually, though, the standout meal is in a place outside of Bangkok. We take a lot of road trips during our visits, which means a lot of eating out in roadside and small-town restaurants. These are usually the highlights of my eating experience. It never ceases to amaze me how a small roadside restaurant can whip out the seemingly endless supply of complex, super-spiced, highly flavored dishes that my SIL orders. Sometimes I'll peruse the menu and put in a request, but more often I leave myself in her capable hands.
During one visit, the standout was a meal on the water in the town of Sri Racha. (This is not the home of the wonderful red sauce in the green rooster bottle. The sauce originated in California—not sure why it's called sriracha sauce.) This setting sounds nicer than it is, as Sri Racha is a sprawling industrial city and the restaurant was a rickety affair set out on stilts over some fetid, polluted water. But the meal was excellent. The standout dish was a plate of deviled red curry crab packed into the crab shells and broiled. I've never had anything like it since. In fact, I've never found this dish on another Thai menu inside or outside of Thailand.
Last summer there were actually two standout meals (well, really three, but two were in the same restaurant). The first was in the this restaurant:

Unfortunately, the picture at the top of this post was not from that restaurant. It was from this restaurant,

Though I didn't find this restaurant outstanding, we did order a couple of new dishes there, ones I've never seen on Thai menus here.


(See a theme here? My SIL makes fun of how much I like red curry. I'm almost alone in this, as most of my family, Mr. Coffee included, doesn't like red-curry or coconut-milk flavored things)
The pancake wedges get eaten with the cucumber sauce in the middle, which is the same cucumber sauce that comes with Thai fish cakes and shrimp cakes. These are sort of in the same vein as the cakes, but without the seafood, a boon for the Vegetarian, who shares my love of red curry. I would totally order these again if I could find them on a menu.
Next post: Thai seafood. And then I promise I'll stop, as it's probably annoying to read about a bunch of food you can't get here.
BTW—I'll be at the Brooklyn Blogfest tonight. I'm looking forward to meeting some other Brooklyn bloggers.
Subscribe to:
Posts (Atom)

 Posts
Posts